Getting Started
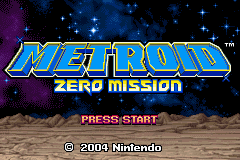
Insert your Metroid: Zero Mission Game Pak into your Game Boy Advance system and turn the power ON. When the title screen appears, press START. Once the Samus Data screen appears, choose one of the three data files and press the A Button. Next, choose "Start Game" and press the A Button.
Finally, choose the difficulty level you want to play and press the A Button.
Continuing a Saved Game
To continue a game you've already begun, choose the save file you want to play on the Samus Data screen and press the A Button. The game will continue from the last Save Room in which you saved or from Samus's ship.
Game Options
On the Samus Data screen, use the + Control Pad to choose Options and press the A Button to change options for the sound and other game settings. Press the B Button to return to the Samus Data screen.
•
Sound: You can play with stereo sound when playing with headphones. Choose the sound option, press the A Button, and use the + Control Pad to change the sound setting.
See page 35 for details on linking with Metroid Fusion. Saving the Game
When you save the game, you can turn it off and resume playing from where you last saved-either in a Save Room or at Samus's spaceship. These are the only places the game can be saved, and it will only be saved if you choose to do so.
Enter a Save Room and stand on the Save Unit to access the option to save game data. Use the + Control Pad to choose "Yes" and press the A Button to confirm. When "Save Complete" appears, your game has been successfully saved.
NOTE! If you turn the power OFF while playing without saving the game, you will have to restart from the last place you saved. If you've never saved, you'll have to restart from the beginning.
Copying & Erasing Files
You can copy and erase data files on the Samus Data screen.
To copy a data file, choose the "Copy" option and press the A Button. Then just choose where you want the extra copy of the file to go, and press the A Button again to copy it there.
To erase a data file, choose "Erase" on the Samus Data screen and press the A Button. Choose the file you want to erase and press the A Button. When prompted, choose "Yes" and press the A Button to confirm that you want to erase the data file. The file will then be erased.
If you hold down the L and R Buttons when you turn the power ON, a screen will appear giving you the option to erase all saved data. To erase all data files and all game progress, choose "Yes" and press the A Button, then choose "Yes" and press the A Button again to confirm. Only then will all data and progress be erased.
Easy Sleep Mode
Easy Sleep allows you to conserve battery life without turning the power off. Easy Sleep is useful for when you want to take a short break but aren't near a Save Room.
Access the Map screen and press the L Button to display the Easy Sleep screen. Choose "Yes" and press the A Button to activate Easy Sleep mode. The screen will then go dark, indicating the Game Boy Advance has entered Easy Sleep mode.
Press and hold SELECT and the L and R Buttons to deactivate Easy Sleep mode. If the power is turned OFF after Easy Sleep mode has been activated, the next time you play you will have to continue from the last Save Room you accessed. Be careful! If the Game Boy Advance is left in Easy Sleep mode for too long, the batteries may run out.
The Status Screen
On the Map screen, press the R Button to view the Status screen and check Samus's status. View the abilities Samus can use on this screen.
The Gallery
You will be able to see different images at the end of the game depending on how much of the game you have completed when you finally reach the end. Once you have seen these images at the end of the game, you can go back and look at them again in the gallery whenever you like.
After you reach the end of the game, the Gallery option will appear on the Options screen. You can then access it via the Samus Data screen. Use the + Control Pad to choose Gallery, then press the A Button. If there is more than one image available for viewing, you can press ◀▶ to scroll through the images. To return to the Options screen, just press the B Button.
Metroid Fusion Special Feature
If you link Metroid: Zero Mission to Metroid Fusion, an added bonus will appear on your Metroid: Zero Mission Game Pak. After loading data from Metroid Fusion, an option to view the Metroid Fusion gallery will appear on the Options screen. View these images just as you would the Metroid: Zero Mission images. Follow the instructions for linking your systems on page 39. On player one's Game Boy Advance, choose "METROID FUSION LINK" on the Options screen and press the A Button to begin loading Metroid Fusion data. Note: If the link fails, an error screen will appear. In this case, check all cable connections and try again from the beginning.
NES Metroid
Once you reach the end of Metroid: Zero Mission, you will be able to play the original NES version of Metroid. Choose "Options" on the Samus Data screen to find the newly added "Original Metroid" option. On the Options screen, choose "Original Metroid" and press the A Button. On the NES Metroid 

.png)
 (En,Fr,De,Es,It).png)
.png)



_1.png)
.png)
.png)
 (Rev 1).png)
 (Promo).png)
_1.png)