Setting Up Your PlayStation 2
Set up your PlayStation 2 computer entertainment system according to its instruction manual. Ensure the MAIN POWER switch (on the back of the console) is turned on. •
When the power indicator lights up, press the OPEN button to open the disc tray.
•
Place The Bouncer™ disc on the disc tray with the label side facing up. •
Press the OPEN button again to close the disc tray.
•
Attach game controllers and other peripherals as appropriate.
•
Follow on-screen instructions and refer to this manual for information on using the software.
Controller Compatibility
Due to the analog features of this game, The Bouncer does not support the original PlayStation™ digital controller or the original DUALSHOCK™ analog controller. The game is optimized for use with the analog functions of the DUALSHOCK™2 analog controller. Starting the Game
The title screen showing the opening demo will appear after the Bouncer disc is inserted and the power is turned on.
•
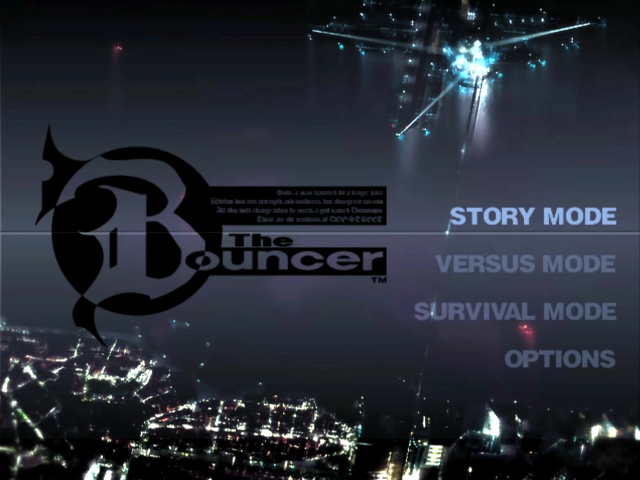
Press the START button while on the title screen to view the game modes.
•
Select the game mode you wish to play.
Game Modes
STORY MODE
In this mode, you can develop your characters by completing battles and events to acquire Bouncer Points.
VERSUS MODE
A competitive mode that allows up to four players to join. There are two variations, each with different winning conditions.
SURVIVAL MODE
In this mode, you must defeat as many opponents as possible before your selected fighter's stamina runs out. This mode is also useful for practicing moves.
OPTIONS
Each setting within the game can be changed according to your preference. After changing settings, if the game ends and you haven't saved the changes, the settings will return to default. Be sure to save your settings.
Controller Settings
•
Vibration: Select vibration function On/Off.
•
Sensitivity: Set button sensitivity.
•
Button Sensitivity Test: Check button sensitivity.
•
Button Configuration: Change button configuration.
Sound Settings
Switch between Stereo/Mono, and switch Dolby Digital 5.1 channel surround sound On/Off. 5.1 channel surround sound can only be utilized when the appropriate system and optical cable are used (5.1 channel surround sound only applies to select movies).
Once Dolby Digital 5.1 channel is selected and the pause function is activated during a movie sequence, there will be no confirm, cancel, or cursor movement sounds. For systems with both analog and optical inputs, connect to either one. The Bouncer utilizes both Dolby Digital and PCM sounds. There may be instances where auto-switching may not be activated for AV amps. Load & Save
Load and save game data.
Language Selection
Select either Japanese or English dialog, subtitles, and game text.
Connecting the Multitap (for PlayStation®2)
Playing in Versus Mode with more than two players requires the multitap (for PlayStation®2).
•
You will not be able to use the original PlayStation® multitap.
•
When using the multitap (for PlayStation®2), make sure to connect it correctly before turning the unit on.
•
1. Be sure to connect the multitap (for PlayStation®2) to controller port 2. The multitap (for PlayStation®2) will not function in controller port 1.
•
2. When using the multitap (for PlayStation®2), make sure that the DUALSHOCK™2 analog controller is connected to the multitap controller port 2-A before connecting to ports 2-B and 2-C.
•
3. When using characters that have been developed in Story Mode, insert the memory card (8MB) (for PlayStation®2) containing that data into the MEMORY CARD slot (1 or 2-A/B/C) corresponding to the DUALSHOCK™2 analog controller you are operating.
BOUNCER POINTS
During Story Mode, if you clear a battle scene, the character you used gains Bouncer Points (BP). By spending BP, you can increase your character's stamina, attack power, and defense power, or master Extra Skills.
Bouncer Points Exchange
•
From the top, Battle Evaluation, Bonus, and Total are listed.
•
Battle Evaluation: The points received after finishing off an enemy. The amount received varies depending on your rank and the power of your enemies.
•
Bonus: Points received for finishing the battle.
•
Total: Total number of Bouncer Points obtained.
•
The number to the right of each power-up is the BP necessary to enhance / buy that power-up.
•
The top three rows are attribute power-ups. Below those three are the Extra Skills the character can master.
•
An evaluation of the character's overall power.
•
The physical abilities of the character displayed. The value on the left indicates the value of the attribute before BP distribution, and the value on the right shows the value after BP distribution.
•
Life: Maximum value of stamina.
•
Power: The higher the value, the more damage you inflict.
•
Defense: The higher the value, the less damage you receive. Raising this attribute also allows the character to guard against more attacks.
•
Displays the description of the selected power-






_1.png)




.png)




_1.png)