How to Use Your Mario Paint Set with Your Super NES
•
Insert your Mario Paint game pak into the Super NES Control Deck. •
Connect the plug from your Super NES Mouse into controller port #1 on the Super NES. Do not plug anything in controller port #2.
•
Move the power switch on the control deck to the ON position.
Title Screen
Similar to a pencil, the Super NES Mouse follows the movements of your hand and moves the cursor on the screen.
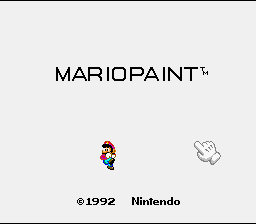
On the title screen, you can move the cursor to the letters that spell "Mario Paint" and click on each letter. This will help you get familiar with the play control of the mouse. What you find may surprise you! To enter the drawing area, click the cursor on Mario. Drawing Tools: Pens and Airbrush
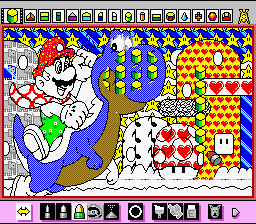
Once you've selected a pen tip, you can start drawing by dragging the mouse across the mouse pad with the left mouse button pressed. The cursor changes size when you select a different pen. To select a different color, move the cursor to the palette and click on a desired icon.
The Airbrush produces a spray can effect. Like the pens, you use the Airbrush by clicking the left mouse button and dragging the mouse.
*Hint from Professor Paint:* "Draw slowly with the small pen to avoid drawing broken lines."
Drawing Tools: Erasers
Mario Paint contains fifteen erasers, consisting of six eraser pens and nine full screen erasers. •
Eraser Pens: These six pens vary in size and allow you to edit a portion of your drawing. They use the same motion as drawing with a colored pen.
•
Full Screen Erasers: These accomplish the same task of clearing the screen, but use different visual effects.
*Hint from Professor Paint:* "If you use Undodog immediately after erasing your drawing, you can see how these erasers work without permanently losing your drawing."
Drawing Tools: Fill Paint Brush
The Fill Paint Brush gives you the ability to accurately fill in an enclosed area with one color or pattern.
To use the Fill Paint Brush, click on the paint brush icon and then select a color or pattern. Next, place the point of the paint brush inside the area that you wish to paint and click the left mouse button.
*Hint from Professor Paint:* "If a line surrounding the painted area is broken, using the Fill Paint Brush will cause the paint to leak outside the line. Don't worry if this happens, though. Click the left mouse button to stop the Fill Paint Brush, click on Undodog to remove the paint from your drawing, fix the broken line, and try again with the Fill Paint Brush."
Drawing Tools: Shape Templates
Mario Paint contains templates that help you easily create perfectly round circles, straight lines, and nice-looking rectangles. To access these templates, click on the circle icon in the main toolbox. On this subscreen, there are four templates for each shape. These four templates use the three pen widths and the airbrush effect to create different line styles.
•
Shape Template Menu Bar: Click on the icon that represents the shape and line width you want to use. Next, press the left mouse button and slowly drag the mouse to draw a rough sketch. Release the mouse button to make a solid line appear over the sketch.
•
Line Icons: Click on one of these icons to create straight lines.
•
Rectangle Icons: These icons let you design shapes like rectangles.
•
Circle Icons: These icons help you draw circles of all shapes and sizes.
Drawing Tools: Character Stamps
The Mario icon in the toolbox accesses a tool that can be used to press colors, patterns, and character stamps onto your drawing. Stamps add detail to your drawing without requiring the effort needed to draw characters freehand. To access the palette of stamps, click on Mr. Crayon. Stamp Designer/Editor
This function lets you either design your own stamps or edit existing stamps. To create a stamp, choose a color and draw an object using the expanded grid that looks like graph paper.
The X square on the right side of the color palette is a transparent color. If you draw Luigi and surround him with white squares, the white color will show when you press the stamp. If you use the X blocks, the stamp will be cut neatly around the drawing.
•
CLEAR: Click on the CLEAR button to start again with a clean piece of graph paper.
•
SAVE: To save your stamp into your personal stamp database, click on the SAVE lever and then click on one of the empty spaces on the palette. You can have up to 15 stamps stored at once. To replace a stamp, save a new stamp over an old stamp.
•
LOAD: To edit a pre-designed stamp, click on the LOAD switch, then click on Mr. Crayon until you find the stamp you wish to change. Click on the stamp and edit it using your palette of colors. Be sure to save it to your stamp database when finished.
*Hint from Professor Paint:* "The small pen tip makes a line that is two squares wide on the stamp grid. Try making a stamp that only uses one square of the stamp grid. Once you've saved it to your database, click on the Mario icon and draw with this ultra fine dot. This should help you draw lines in areas that require a lot of detail. You can also create an eraser using the same procedure with a single white dot." Drawing Tools: Copy
The copy function allows you to capture a section of your drawing and copy it to another area of the drawing
 (En).png)

.png)

.png)
.png)

.png)
.png)


.png)
 (Beta).png)