GETTING STARTED
Set up your PlayStation®2 computer entertainment system according to its Instruction Manual. Ensure the MAIN POWER switch (located on the back of the console) is turned on.
Press the RESET button. When the power indicator lights up, press the open button to open the disc tray. Place the GLADIATOR SWORD OF VENGEANCE™ disc on the disc tray with the label side facing up. Press the open button again to close the disc tray.
Attach game controllers and other peripherals as appropriate. Follow on-screen instructions and refer to this manual for information on using the software.
Memory Card (8MB) (for PlayStation®2)
GLADIATOR SWORD OF VENGEANCE™ only supports MEMORY CARD slot 1. To save game settings and progression, insert a memory card (8MB) (for PlayStation®2) into MEMORY CARD slot 1.
GLADIATOR SWORD OF VENGEANCE features an AutoSave system, and the game will automatically save your game progression at certain points. Insertion or removal of the memory card (8MB) (for PlayStation®2) after switching the console on may cause data to be overwritten or lost.
GLADIATOR SWORD OF VENGEANCE also sports manual save and load of game data from the Main Menu. After performing a manual save/load, the game will again AutoSave your progression at the relevant points.
OPTIONS
SFX VOLUME
Use sliders to adjust the sound effects volume.
MUSIC VOLUME
Use sliders to adjust the music volume.
VIBRATION
Choose to play with vibration effect ON or OFF.
PLAYING GLADIATOR
Game Display
NEW GAME
When you first start the game, only the New Game option will be available.
LOAD GAME
Select from a previously saved game slot in order to resume playing.
PAUSING THE GAME
Press the START button at any time to pause the game. On the pause screen, you will have these choices:
You can also view your inventory of health slots, tablets, coins and amulets.
Note: Returning to Elysium causes you to lose certain items such as: keys, levers (from broken levers), the jupiter idol, the ferrycoin, etc.
SECONDARY TARGET LOCK
While locked onto a primary target, other enemies become potential secondary lock targets. Holding down the secondary target lock trigger (L1 button) will select the enemy currently indicated by a gray health bar as the secondary target lock.
While holding down the secondary target lock button, Thrax's attacks will be aimed at this enemy. To return Thrax's attention to the primary lock target, simply release the secondary target lock button.
LOCK ICONS
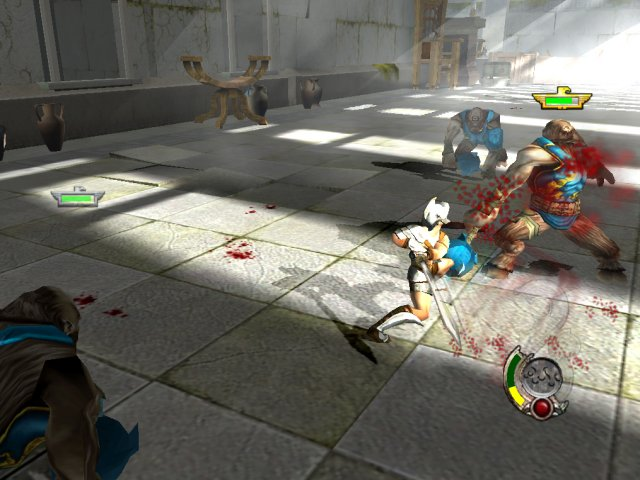
Lock icons contain health bars that allow you to gauge how much health an enemy has remaining. Lock icons are gray in color until locked onto, at which point they turn gold.
Gray lock icons also signify potential lock targets (either primary or secondary). When an enemy is outside of the screen/frame, the lock icons will move to the side of the screen which Thrax must turn to face them.
ATTACK BUTTONS
Press combinations of the two attack buttons in a measured manner to perform attack chains (strings of attacks). Each successive press of the button after the last adds a new attack to the last until the chain is completed (3 attacks long). The attack sequence for each weapon depends on the weapon used.
The Fight Gauge
Once collected, a weapon's Fight Gauge rewards you with mid-combat bonuses for skillful fighting. The Fight Gauge is displayed at the top of the screen and shows successful maneuvers you've just pulled off as well as showing you how far along the gauge you currently are.
Successive maneuvers (hits, evades, switch attacks, kills, etc.) will make the Fight Gauge increase more quickly. Icons sit on the Fight Gauge at measured points and once the Fight Gauge reaches them you will be awarded with bonuses. Such bonuses include:
•
DOUBLE ARMOR - reduces the amount of damage received from enemy hits
•
DOUBLE DAMAGE - increases damage dealt out to enemies
•
SHIELD BREAK - breaks through enemies who attempt to block Thrax's attacks
•
REFLECT ARMOR - deals out damage to enemies who land a hit on Thrax.
...plus many more for you to discover.
Each weapon type (sword, axe and gauntlets) has its own Fight Gauge with the rewards along it distributed at different points. Further, each Fight Gauge is split into four sections.
Collecting the first Fight Gauge for a weapon will only allow the lower end rewards to be awarded during combat. Later, you will be able to collect Fight Gauge Extenders, which extend the Fight Gauge, allowing you to build it up further, and therefore award you with greater bonuses during combat.
Building up the Fight Gauge requires the player to pull off evades between attack chains and maneuvers during them. Button-mashing and/or uninspired fighting will cause the Fight Gauge to drop (accelerate towards zero) until a successful maneuver is pulled off.
Kill Moves (Executions)
Champion enemies are set apart visually from the others in terms of coloration, armor differentiation and size.
.png)

.png)
.png)
.png)
