Starting Up
Insert the "SEGA RALLY™" Game Pak and push the Power Switch of the Nintendo® Game Boy® Advance to the right. The Name Entry Screen will appear the first time you play.
Select a character using the Control Pad and press the A Button to confirm. Press the B Button to delete the character before the one highlighted. To delete the highlighted character, select DEL displayed on screen. Press END to finish name entry.
The name you entered on the Name Entry Screen will also be displayed on the Championship/Time Attack Name Entry Screen when you receive a prize. The name you entered can be modified on the Name Entry Screen at the completion of any Time Attack Run.
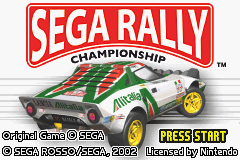
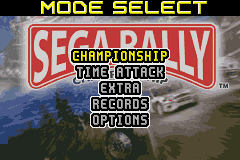
The Title Screen will be displayed after a name entry is finished. Then press START on the Title Screen. Next the Mode Selection Screen will appear. Choose a mode to play according to the number of players.
Mode Selection
•
SINGLE PLAY (Refer to p.7): 1-player Mode. There are 5 menus in total to choose from.
•
MULTI PLAY (Refer to p.21): 2 to 4-player Mode. Be sure to connect the Game Boy® Advance Game Link® cables before starting a game.
How to Play
Select a mode to play according to the number of players.
•
CHAMPIONSHIP (P.8): Compete against 12 COM (computer-controlled) cars and get the fastest time.
•
TIME ATTACK (P.13): Choose a course to run and challenge the Time Attack!
•
EXTRA (P.16): You can purchase new courses or cars. You can also play mini games here.
•
RECORDS (P.18): You can view your record ranking as well as the password awarded when receiving the 1st prize in Championship or Time Attack (See p.18).
•
OPTIONS (P.19): Modify various game settings such as navigation voice or screen setting.
Championship
In this mode, you compete against 12 COM cars and try to finish the race within the time limit. Upon completing a race, you will be awarded points depending on your rank. You can use the points awarded to purchase items (Refer to p.16).
Step 1: Select a Cup to Race
Choose a cup to race. Note that only Amateur Cup can be selected the first time you play.
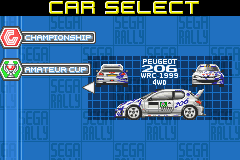
Step 2: Select a Car
Choose a car to race. Use the Control Pad to scroll through the available cars and press A Button to enter a selection.
Step 3: Select a Transmission Type
Choose the transmission type of the car you are racing. Choosing “Automatic” lets your car shift gears automatically. If “Manual” is selected, the gears must be shifted manually.
Step 4: Confirm the Race Information
Check the race information such as Course, Weather and Time of day. Press ◄ ► on the Control Pad to view the detailed information.
•
1 Start the rally (p.10)
•
LENGTH: Full length of course
•
UNDULATION: Vertical interval of course undulation
•
5 Weather and Time of Day
•
6 Condition of Road Surface (* displayed in percentage)
Car Settings
You can change settings on the following items on this screen. To change, select a setting using the Control Pad and press A Button. Pressing B Button enables you to cancel the settings and return to the previous screen.
•
TRANSMISSION: Select between Automatic and Manual.
•
GEAR RATIO: Adjust the Gear Ratio. (LOW: advantage in Acceleration > NORMAL > HIGH: advantage in Top speed)
•
SUSPENSION: Adjust the stiffness of suspension from 3 levels.
•
STEERING: Adjust the speed of how quickly the wheel responds to your command.
•
BRAKE: Adjust the speed of how quickly the brake responds to your command.
•
TIRE TYPE: Choose the type of tire according to the rally condition.
Step 5: Start the Rally
This shows how to view the screen during the race. Use SELECT to switch between Rear view and Driver's view.
Pause Screen
To display the Pause Screen, press START during the race. Select “CONTINUE” to resume the game.
•
CONTINUE: Resume the race.
•
RESTART: Restart the course from the beginning.
•
QUIT RACE: Quit the race.
Time Up
If you cannot reach the Goal within the time limit, the game is over.
Step 6: Clear
If you reach the Goal within the time limit, the course will be cleared. Once you clear a course, your ranking as well as the time will be displayed.
Step 7: Ranking
The Ranking Screen on the


.png)
.png)
.png)
 (En).png)


 (En,Fr,De).png)