Setting Up Your PlayStation
•
Set up your PlayStation™ game console according to its instruction manual. •
Make sure the power is OFF before inserting or removing a compact disc.
•
Insert the NHL Breakaway™ '98 disc and close the Disc cover.
•
Insert game controllers and turn on the PlayStation™ game console. Multi-Tap for Multiple Players
To play with up to 8 players, insert a Multi-Tap into controller port 1 and another Multi-Tap into controller port 2. Then, insert up to four controllers in each Multi-Tap.
NOTE: Multi-Tap(s) sold separately.
Starting a Game
Follow on-screen instructions to start a game.
Saving Game Data
NOTE: A player will need a Memory Card (sold separately) in order to save game data.
PlayStation Console Diagram
Moving Through Menus
Unless stated differently, use these controls to navigate menus:
•
Press or Directional Buttons to highlight a choice.
•
Press or Directional Buttons to toggle settings.
•
Press the to confirm/accept a choice and/or advance to the next screen.
•
Press the to cancel a selection and/or go to a previous screen.
•
Press the START BUTTON to pause and resume the game, and to use in-game Pause Options.
The Help Bar
Look at the bottom of the screen for important tips on moving through menus, selecting options, using button controls and other stuff.
Main Menu
•
Controller Configuration
The Speed Menu
In all game modes, the Speed Menu lets you make changes really fast.
•
Press the SELECT BUTTON to bring up the Speed Menu.
•
Scroll to the desired item and press the BUTTON.
Saving & Resuming Games & Settings
To save game data, you need a Memory Card (sold separately). A player can save information by inserting a Memory Card into controller port 1, on either the console or on the Multi-Tap, at start up.
When a save screen appears, the console will detect the status of the player Memory Card. If your card is unformatted, you will be prompted to format it. Likewise, if there is not enough free space (empty memory blocks) to save your data, you will be prompted to overwrite (erase) an existing record. Select 'YES' to do so.
When you select Playoff or Season mode, you will be prompted to start a New Season/Playoff, or to Resume one on your Memory Card.
•
To resume a game using a Memory Card, select Season or Playoff mode.
•
If a Memory Card with a saved season or playoff is detected, you can then scroll to the game you wish to load and press the BUTTON. The data will load, and you can begin the next game on your schedule.
For information on saving and loading custom players built in Create Player, please see page 8.
Play Mode
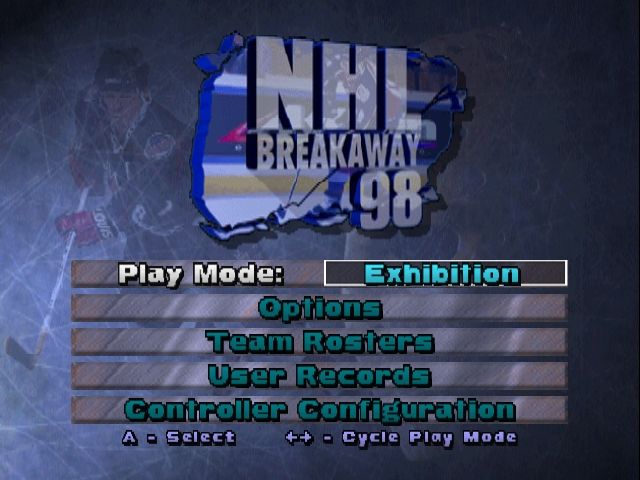
At the Main Menu, you will see a bunch of different choices. These are explained in detail later on.
Exhibition
A regular one game match. Choose from NHL, International or All-Star teams.
Practice
Practice your even-strength, goaltending or special teams play before getting into a game if you hope to win.
Shoot-Out
Who has the puck power it takes to win the shoot-out? You've got five shots each to find out!
Playoffs
The ice heats up when you jump right into dramatic Playoff action and try to get cup crazy!
Season
The ultimate test of your total hockey skills, on and off the ice!
Options
Set up the rules for your exhibition or practice game.
User Records
If you're smart enough to use a Memory Card, then you can enjoy gloating over your stunning record or moaning over it and wishing you played better (see Practice). This feature also lets you delete old names, seasons, playoffs, etc.
Controller Configuration
Allows you to modify which buttons do what. Press the button on the controller you wish to configure to enter.
Team Rosters
This lets you view and maintain NHL rosters, keeping up with the latest trades and minor league call-ups.
Creating Players
You can create and save up to 30 custom players, then bring them in to dominate your opponents (or build weak-kneed jerks with no skills and put them on opposing teams!).
Besides naming your player and determining his height, weight, hometown and years in the NHL, you can adjust his skill levels in all areas to create a seamless match of skills across your roster.
To create a player, first highlight a player slot and press the BUTTON. If all slots are full, you can overwrite (erase) one to make room for a new one. You will come to the player attribute screen.
•
Use the Directional Buttons to highlight an input area, and press the BUTTON to activate it.
•
Directional Button increases numbers, letters and attribute settings.
•
Directional Button decreases numbers, letters and attribute settings.
•
or Directional Buttons move the character highlighted forward or backwards.
•
When you are through with an area, press the BUTTON to confirm your settings, and use the Directional Buttons to move to the next area.
.png)

.png)
.png)
.png)
