GETTING STARTED
Set up your PlayStation 2 computer entertainment system according to the instructions in its Instruction Manual. Make sure the MAIN POWER switch (located on the back of the console) is turned on. Press the RESET button. When the power indicator lights up, press the OPEN button and the disc tray will open. Place the kill.switch™ disc on the disc tray with the label side facing up. Press the OPEN button again and the disc tray will close.
Attach game controllers and other peripherals, as appropriate. Follow on-screen instructions and refer to this manual for information on using the software.
About Progressive Output
Higher video quality can be enjoyed if a component AV cable for PlayStation 2 (SCPH-10100U) and a progressive scan (480p) television set with component video input are used. If a television set without progressive scan (480p) capabilities or a connection other than with a component AV cable is being used, the picture may not display properly in progressive scan mode. For instructions on how to use the component AV cable to connect the PlayStation 2 to a television set, please consult the instruction manual for the PlayStation 2 or the diagrams included with the component AV cable. Furthermore, please set the Component Video Out settings on the PlayStation 2 to Y Cb/Pb Cr/Pr under System Configuration. Some television sets with component video inputs may not be progressive scan (480p) enabled. Please consult the television set's instruction manual or contact the manufacturer to confirm. Selecting Progressive Mode
Hold down the button and the button while the game is booting. The following prompt will appear: "Change to Progressive Mode?"
Carefully read the warning on the screen. Select "Yes" with the directional buttons and confirm with the button to switch to progressive mode. If the screen displays correctly, select "Yes" once again. If the screen is scrambled or otherwise displays incorrectly, please press the Reset button on the PlayStation 2 to reboot and enjoy the game in Normal Mode. BASIC TRAINING
OFFENSIVE COVER SYSTEM FIRING
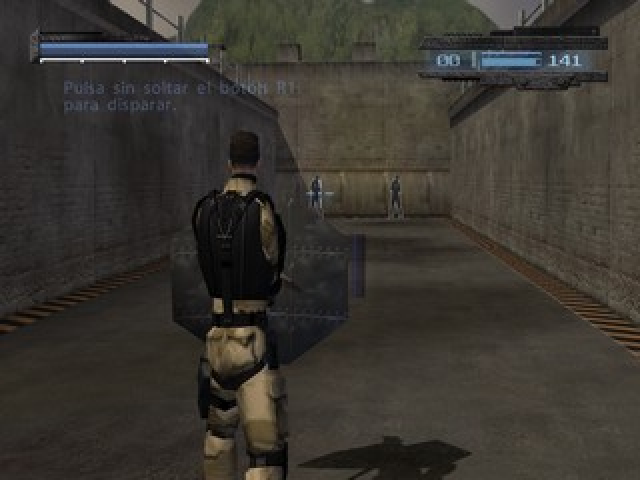
While taking cover, move the left analog stick left or right to move in that direction until you reach the edge of cover. Continue holding the left analog stick until the operative leans over. Press the R1 button to fire. Move the right analog stick to aim and look.
If using crouch height cover, you can also move and hold the left analog stick up to make the operative rise from the crouch position and take aim. Press the R1 button to fire. Move the right analog stick to aim and look.
You can use a weapon's scope or zoom feature while aiming from cover.
OFFENSIVE COVER SYSTEM BLINDFIRE
While taking cover, move the left analog stick left or right to move in that direction until you reach the edge of cover. Do not make the operative lean over. Press the R1 button to fire. Move the right analog stick to direct Blindfire in that general direction.
If using crouch height cover, press the R1 button and the operative will remain crouched and fire his weapon above him. Move the right analog stick to direct Blindfire in that general direction.
WEAPON BASHING
To perform a weapon bash on an enemy, press the button. The operative must be standing close to an enemy for the hit to connect.
ACTION/INTERACT
The button makes the operative interact with certain objects in the environment. For example: a door or a gun emplacement.
Some actions require the button to be held for a certain amount of time before the action can be completed. Press and hold the button until the action is completed. MAIN MENU INTERFACE
TITLE SCREEN
Press the START button at the Title Screen to access the Main Menu.
MAIN MENU
In the Main Menu, use the left analog stick or directional buttons to highlight an item. Press the button to select it.
NEW GAME
Begin a brand new game. Before starting, you will be asked to select between the Normal or Hard difficulty levels. The Hard difficulty setting is recommended for players seeking a greater challenge.
Note: The Reticle Highlight feature is disabled when playing on the Hard difficulty setting.
LOAD GAME
Load a previously saved game, if available.
MISSION SELECT
Start from the beginning of a previously completed mission.
Note: This option will not be available until a mission has been completed once.
OPTIONS MENU
Set and adjust a variety of game settings, all of which are listed below.
Note: Default game settings are in bold type.
CONTROLLER SETTINGS
Set the controller's vibration feature.
Invert vertical axis of the Aim/Look controls.
Invert horizontal axis of the Aim/Look controls.
Adjust the speed of the Aim/Look controls.
If enabled, the Targeting Reticle will turn red when it is aimed directly at an enemy.
Note: The Reticle Highlight feature is disabled when playing on the Hard difficulty setting.
**OPTIONS
.png)

.png)



.png)

.png)



.png)

_1.png)

_1.png)
_1.png)

_1.png)
.png)

_1.png)
_1.png)


_1.jpg)