Setting Up
Set up your PlayStation game console according to the instructions in its Instruction Manual. Make sure the power is off before inserting or removing a compact disc. •
Insert the BLASTER MASTER disc and close the Disc Cover.
•
Insert game controllers and turn on the PlayStation game console. •
Follow on-screen instructions to start a game.
Console Top View
Console Front View
Starting the Game
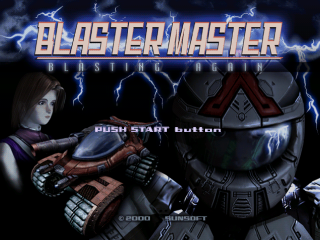
Start Screen
Choose this to play the game from the beginning.
Choose this to resume a previously saved game. It cannot be chosen if no game data exists in the Memory Card inserted in the Memory Card slot.
Allows you to adjust various settings.
Loading a Game
First select the Memory Card slot which the Memory Card is inserted in with the Left and Right directional buttons, and press the X button to confirm. Then select the game data you want to load with the Up and Down directional buttons, and press the X button to confirm.
Option Screen
In the OPTION screen, you can review or change the following settings. Use the Up and Down directional buttons to select an item and press the X button. Then set it to whatever you want and press the X button to confirm the change.
Allows you to set the game difficulty level. Choose from EASY, NORMAL, HARD.
Allows you to select the game view point. Choose from LONG or UP.
Allows you to select the sound mode. Choose from stereo or mono.
Allows you to watch the movies you have previously seen in the game.
Allows you to turn the vibration on/off if you are using a DUALSHOCK™ analog controller.
Allows you to set the BGM volume.
Allows you to change the key assignments.
Movement
Map Restrictions
This game has two different types of areas: Areas for the vehicle to pass through, and areas where only Roddy can go. Switch between the vehicle and Roddy from time to time, depending on the type of area you want to go to. Extra Move
Vehicle Options
The vehicle can have up to four EXTRA MOVE options. At first, the vehicle does not have any of these moves, but they will gradually become available as you proceed with the game.
The four EXTRA MOVE options are listed on the next page, and the one assigned to the vehicle at that time, is the one which is activated. To activate, you have to press the A button, but it cannot be done if the Action gauge has reached zero.
Attack (Vehicle)
Fires the vehicle's basic gun.
The vehicle can have four EXTRA SHOT options. At first, the vehicle does not have any of these, but it will gradually become available as you obtain energy items. EXTRA SHOT can be powered up as the gauge increases. Each EXTRA SHOT can be powered up in three levels as the gauge increases. The four EXTRA SHOT options are listed on the next page, and the one assigned to the vehicle at that time, is the one which is activated. To activate, you have to press the O button, but it cannot be done if the Option gauge has reached zero. .png)

.png)
.png)
.png)
