GETTING STARTED
Set up your PlayStation®2 computer entertainment system according to the instructions in its Instruction Manual. Make sure the MAIN POWER switch (located on the back of the console) is turned on.
Press the RESET button. When the power indicator lights up, press the Open button and the disc tray will open. Place the Blade™ II disc on the disc tray with the label side facing up. Press the Open button again and the disc tray will close.
Attach game controllers and other peripherals, as appropriate. Follow on-screen instructions and refer to this manual for information on using the software.
Memory Card (8MB) (for PlayStation®2)
Blade™ II requires a memory card to save your games. A saved game's data takes up 73 KB.
You can obtain a memory card through the retailer where you purchased your PlayStation®2 game console or this game.
360° Combat
Blade is the ultimate vampire hunter, fighting off hordes of evil suckheads who cowardly attack him in large groups. Since vampires don't just line up to get killed, Blade needs to attack in any direction - this is where 360° Combat comes into play.
•
Punch & Kick - right analog stick: To execute a punch or kick, press in the direction of the nearest vampire with the right analog stick. Get the timing right to perform combos.
•
Note: There is no need to turn Blade; just press in the required direction.
•
Block - L2 button: Blade can block an attack from hand-to-hand combat by pressing the L2 button. This block can only be held for a few seconds before Blade becomes vulnerable again.
•
Note: Blocking is also useful as it can initiate finishing moves.
•
Rage - R1 button: Press to unleash Blade's Rage once his Bloodlust has reached the desired level (see ADVANCED COMBAT on page 11).
Weapons
•
Select Weapon - HOLD the R2 button + → on the right analog stick: To select a weapon, hold the R2 button and use the right analog stick to cycle through current weapons. Release the R2 button when the required weapon is shown in the Glaive at the bottom left of the screen.
•
Note: To take out Blade's sword you need to activate one of the Rage modes.
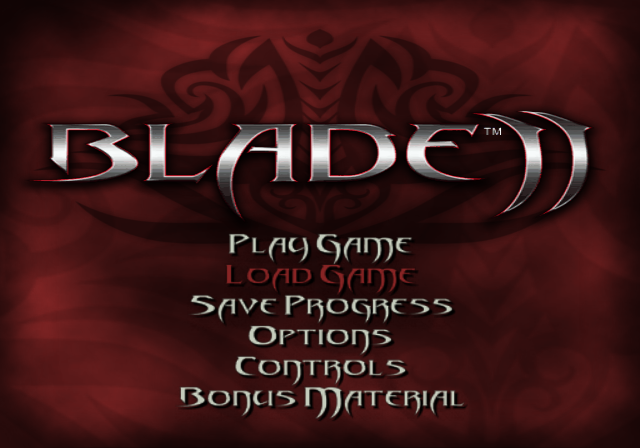
MAIN MENU
Play Game
Select this option to start a new game. Resume a Blade™ II game from a memory card (8MB) (for PlayStation®2) using the Load Game option.
Load Game
Select this option to load a previously saved Blade™ II game from a memory card (8MB) (for PlayStation®2). Once loaded, you can resume the game from the Play Game option.
Save Progress
This option allows you to save your current game and settings to a memory card (8MB) (for PlayStation®2).
Note: You are also able to save progress at the end of each successfully completed mission.
Options
This option allows you to configure the game settings to your personal preferences.
Controls
This option displays the controller settings.
Bonus Material
Select this option to view bonus items included with the game.
PLAY GAME
Tutorial
Before Blade takes on the Vampire Nation, he likes to train in Whistler's warehouse hideout. Training gives you the chance to get used to Blade's weapons and combat controls.
Note: You may go back into the training area at any time to brush up on your moves.
Campaigns
Blade™ II takes place over three campaigns, each with its own locations, missions and vampire tribes to battle. Once you have completed the Tutorial, the first campaign, The Karkov Tower becomes available.
To select a campaign, highlight it by scrolling UP or DOWN using the left analog stick and then press the X button.
Missions & Objectives
Each campaign is made up of a number of missions. Only missions that have been unlocked can be played. A new mission is unlocked once you have successfully completed the previous mission.
Available missions can be scrolled through using the left analog stick and selected by pressing the X button.
Each mission includes an objective and often a sub-objective. Completing sub-objectives will be rewarded with bonuses. You can view your mission objective during the game from the Pause Menu.
Equipment Selection
This screen allows you to select the weapons, ammo and equipment Blade will take into the mission. Each weapon has its own characteristics, and certain weapons may make completing the mission more difficult. Choose wisely.
Initially, the equipment available is limited. More equipment becomes available when Blade earns high scores. So try for as high a score as possible on each mission to unlock the weapons quicker.
Blade can only carry a limited amount of equipment. When you first access the Equipment Selection screen, all his slots are empty. Below the slots is a scrolling list of items he can select. Only items that are available can be selected.
To select an item, scroll left or right using the left analog stick or the directional buttons and then press the X button when the item you want is highlighted. Items can fill up one or more slots.
Once you have selected a weapon such as the Mach Pistol, its ammunition will become available for selection.
To deselect an item, highlight it in the scrolling selection at the bottom
.png)


.png)
