MAIN MENU
When you start the game, the Main Menu appears with the following options:
•
CONTINUE – Continue the most recently saved game.
•
NEW GAME – Select a MEMORY CARD slot to create new game data and begin a new game.
•
LOAD GAME - Choose and continue a previously saved game.
•
GALLERY - View movies that you unlock through play.
•
OPTIONS - Change game settings in the Options Menu.
OPTIONS
Play Settings
•
Separate Projectile/ Melee in Weapon Slots (YES*/NO): By default, only one projectile weapon and one melee weapon can be selected in your Primary and Secondary Weapon slots. Setting this option to NO allows you to assign two projectile weapons or two melee weapons in your Primary and Secondary Weapon slots.
•
Aiming Scheme (MANUAL/AUTOSWITCH*): By default, Van Helsing sometimes switches targets when the Aim (R1) button is held. Setting this option to MANUAL disables auto-switch and lets you switch to new targets manually by tapping the Aim button repeatedly.
•
Done: Accept play settings and return to the main Options Menu.
Audio/Video Settings
Adjust audio and video settings:
•
Sound Effects and Movies (Slider): Adjust the volume of sound effects in the game.
•
Music (Slider): Adjust the volume of music in the game.
•
Progressive Scan Video Mode (ON/OFF*): For a clearer picture, set this option to ON only if your television supports progressive scan and you are using component video cables with your PlayStation®2. This option is set to OFF by default.
•
Done: Accept audio/video settings and return to main Options Menu.
Control Layout
Adjust controller settings:
•
Vibration (ON/OFF): By default, controller vibration is ON. Set this option to OFF to disable it.
•
Control Scheme (Scheme 1*-3): Choose from three control schemes for Van Helsing.
•
Done: Accept settings and return to main Options Menu.
Control Layout Diagram
Reset to Defaults
Reset all options in the Play Settings, Audio/Video Settings, and Control Layout menus to their default settings.
Accept & Exit
Accept changes and exit the Options Menu.
START MENU
Press the START button anytime in play to access the Start Menu.
Return to the game.
Enter the Inventory Menu. Use the left analog stick to scroll left or right and access four different sub-menus:
•
Items: The Items Menu lists disposable items that you have collected and offers the chance to use them, helping you in your quest.
•
Weapons: The Weapons Menu lists weapons you have collected and provides a brief description of each one.
•
Moves: The Moves Menu lists moves you have purchased from the Armory and provides a brief description of each one.
•
Cheats: The Cheats Menu shows cheats you have acquired from Cheat Glyphs and provides you with switches and information to activate/deactivate them.
HUD (HEADS-UP DISPLAY)
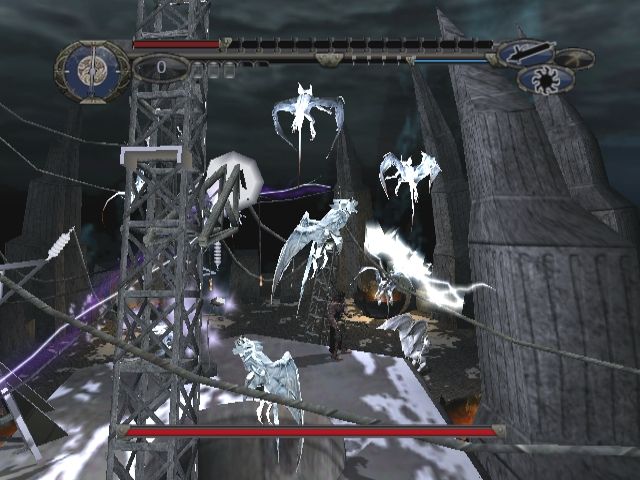
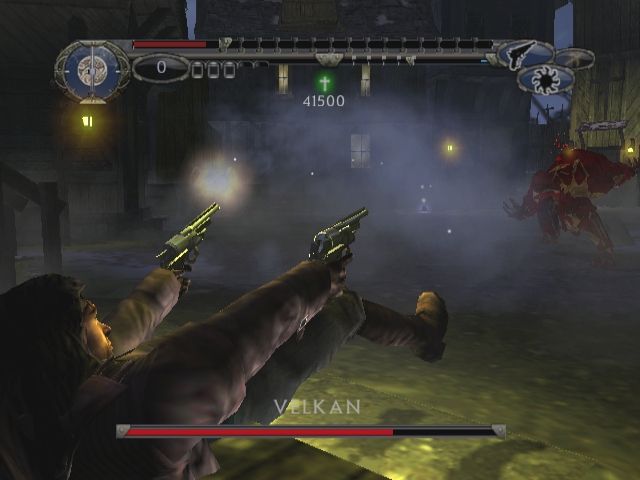
The HUD, which displays valuable information about Van Helsing, his environment, and monsters is available when enemies are nearby, power glyphs are collected, or the Aim (R1) button is used.
LIFE BAR
Your Life Bar extends across the top and center of the screen. If the meter ever empties, you will die and lose some of your progress. Your Life Bar capacity will increase as you collect Health Increaser Glyphs through exploration and by purchasing Health Increasers in the Armory (see Armory, p.16).
KILL TIMER
To the left of the Life Meter is the Kill Timer. Whenever you hit a monster, the timer begins to count down. If you kill a monster before the timer runs out, a point is added to your Kill Counter. If the timer ever counts down, the score on your Kill Counter is reset.
KILL COUNTER
The Kill Counter is located to the right of the Kill Timer. It records how many monsters you kill before the counter runs out. You acquire more finishing moves by achieving high scores on the Kill Counter.
FINISHING MOVES
Finishing Moves are displayed to the right of the Kill Counter. Empty canisters represent unavailable finishing moves. A new Finishing Move becomes available whenever five kills are recorded on the Kill Counter. You can increase the number of canisters available by purchasing Finisher Slots from the Armory (see Start Menu p.8).
POWER GLYPH COUNTER
The Power Glyph Counter is located between the Finishing Moves and the Ammo Bar. Whenever you collect a power glyph, or when the Aim (R1) button is held, the Power Glyph Counter appears on screen to display the total number of power glyphs collected.
AMMO BAR
The Ammo Bar is a blue bar located to the left of the Weapon Icons. In Alternate Ammo Mode, you drain your Ammo Bar with each shot you fire. You can regenerate your alternate ammo with normal attacks, and you can increase your Ammo Bar capacity by purchasing Ammo Increasers in the Armory (see Start Menu p.8).
WEAPON ICONS
To the left of the Grapple Icon are your Primary (Projectile) and Secondary (Melee) Weapon Icons. When using Weapon Select, these weapon icons expand into your
.png)

.png)

.png)

.png)
_1.png)
.png)


_1.png)