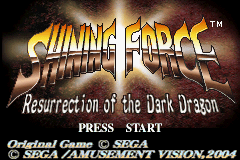
Game Overview
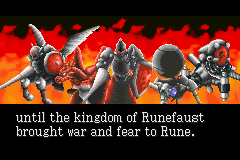
The Shining Force adventure begins in the kingdom of Guardiania and progresses over much of the land of Rune. The story is divided into 8 Chapters and alternates between the saga of the Shining Force led by the Hero, and the journey of Princess Narsha of Runefaust. The game progresses through towns and fields. Towns allow you to gather information and make purchases, while fields engage you in battle. The objective is to defeat enemies and accomplish the mission to clear the scenario.
Starting and Continuing Games
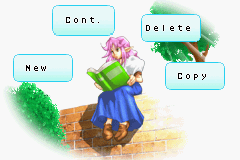
To start a new game, select a language and press START at the Title Screen. View the opening introduction and Save File Selection Screen, then select “New” to begin. Choose a Save File from 1 to 3, as game progress will be saved in the selected file.
Enter the Hero's name using up to 7 characters. Use the Control Pad and A Button to select highlighted letters, and the B Button to delete letters. Select “End” when complete.
To continue from a previously saved game, select “Continue” at the Save File Selection Screen. When the Save Files are displayed, select the desired game. You can also choose “Delete” to erase a file or “Copy” to duplicate data to another slot.
Saving Progress
Save your progress in Town Mode at the Church. Speak to the priest and select “Record.” When the save is complete, selecting “No” when asked if you wish to continue returns you to the Title Screen.
In Battle Mode, press START or the L Button to display the Menu. Select “Quit” to save the present circumstances and return to the Title Screen.
Menu Icons
Pressing START or the L Button during gameplay displays Menu icons. Use the Control Pad to choose an icon and the A Button to select it.
Town Mode Menu
•
ITEM/EQUIP: Relates to Items, Weapons, and Equipment. This displays the Equipment Select Screen, showing a list of characters. Use the Control Pad to choose a character, and the A Button to select them.
•
USE: Use the selected Item.
•
REMOVE: Remove the selected Item. Items under EQUIP move to ITEMS, and those under ITEMS go to the Item Box.
•
DROP: Throw away selected items. Rare items accidentally dropped or sold can sometimes be found at stores as a Deal.
•
GIVE: Pass an item to another character by selecting the recipient from the menu.
When in the Equipment Select Screen, choose a blank space under EQUIP or ITEMS and press A to equip or carry an Item. Selecting a space with an existing Item brings up the Equipment Menu.
Battle Mode Menu
•
TURN: Displays the order characters act, with faster characters listed earlier.
•
QUIT: Records progress and returns to the Title Screen.
•
MAP: Displays the battle area. Blue flashing marks are allies, and red flashing marks are enemies. Press A to view Clear Conditions and Bonus details.
•
CONFIG: Change gameplay settings such as Message Speed, Sound Balance, Voice FX, Window Color, and Window Brightness.
Towns and Villages
In towns and villages, you can gather information, find allies, and purchase items.
At the Store
Talk to the storekeeper to access the following options:
•
BUY: View items for sale. Use left/right arrows to choose an item and A to select. Use down/up arrows to change quantity in tens, and left/right arrows to change by single units.
•
REPAIR: Repair damaged weapons, which break easily when used as tools.
•
SELL: Sell possessions. Choose which character sells which item.
•
DEALS: Occasionally, rare items you have dropped or sold will appear.
At the Church
Every town has a Church where you can record progress and heal allies via the priest:
•
RECORD: Record your progress.
•
CURE: Heal cursed allies for a variable fee.
•
REVIVE: Restore wounded allies to health for a variable fee.
•
PROMOTE: After reaching Level 10, most characters can be promoted. They return to Level 1 but gain greater weaponry and higher maximum ability levels, becoming far stronger.
At Headquarters
The Headquarters is built beneath town, where allies rest and equip themselves. Speak to Strategist Nova at the entrance for these options:
•
ADVICE: Receive tactical advice for the next battle.
•
FORMATION: Decide who joins the next battle. A maximum of 12 characters, including the Hero, can be chosen. Press A to select members; all are selected by default if there are fewer than 12 allies.
•
BANK: Store money so it is not halved if the Hero is injured in battle.
Stats and Status
View the status of each character using the STATS icon. Use left/right arrows to switch displays, down/up arrows to select a character, and A to view details.
Status List
•
EX: Experience gained at the present level.
•
HP: Hit Points. Character dies if HP falls to 0.
•
MP: Magic Points. Reduced when magic is used.
•
AT: Attack. Determines damage inflicted.
•
DF: Defense. Determines damage taken.
•
SP: Speed. Faster characters move first in battle.
•
MV: Movement. Determines how far characters can move.
*


.png)
 (En,Fr,De,Es,It).png)