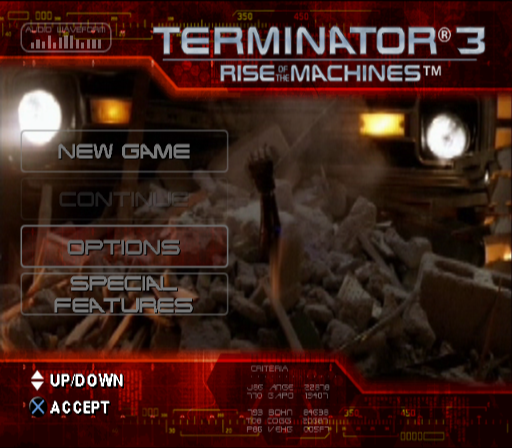
Options Menu
Display the Options Menu. You can also access the Options menu in-game by pressing the START button.
Special Features
Check here for movie clips that you have unlocked, including exclusive clips shot just for the game and "B-roll" footage that shows alternate angles of scenes and allows you to see behind the scenes of the movie.
You'll also find storyboards used to create the game and production concept art.
Also check out "The Making of Terminator 3: The Game" for exclusive interviews with the cast and crew and a behind-the-scenes look at what went into putting the game together.
Some of these features will be available when you start playing and others unlock as you play so check here often. Don't forget to look for some hidden classic Atari games as you advance through the game. Audio
Adjust the volume of the in-game music, voice-overs and sound effects and switch between stereo and mono sound.
•
Move the left analog stick up or down to select which feature you want to adjust.
•
Move the left analog stick left or right to decrease or increase the volume, respectively.
Controls
Re-map the controller configuration to suit your own preferences. You can save and load saved configurations or reset the controller to its default setting.
Game Settings
XY Sensitivity
You can change the speed at which your weapon reticule moves by adjusting the XY slider.
•
Move the left analog stick left to move the slider toward the negative symbol (-) to slow down the rate of speed at which your reticule moves.
•
Move the left analog stick right to move the slider toward the positive symbol (+) to increase the rate of speed at which your reticule moves.
•
Press the button to confirm.
Difficulty
There are three difficulty settings: Easy, Medium and Hard. The difficulty setting affects the health and accuracy of enemy units.
Vibration
Turn DUALSHOCK®2 analog controller vibration ON or OFF.
Invert Controls
Set invert controls to YES or NO. When set to yes, moving the right analog stick down causes the Terminator to look up, and moving the right analog stick up causes the Terminator to look down.
Auto-Save
Toggle Auto-Save ON/OFF. With Auto-Save ON, your game is saved automatically each time you complete a level.
Weapon Auto-Switch
Toggle Weapon Auto-Switch ON/OFF. With Weapon Auto-Switch ON if the Terminator picks up a weapon that is more effective he will automatically switch to that weapon.
Save / Load
Select Load Game and press the button to load a game from memory card. You can load any successfully completed game segment.
Cheats
Enter codes to unlock special game cheats, movies and more!
Pause Menu
Press the START button during gameplay to pause and enter the Pause menu. Here you can acquire additional information or access the Options menu.
Resume
Return to the game in progress.
Mission Objectives
View the current mission objectives.
Map Screen
Display the map of the current level.
Options
Adjust game settings.
Restart Level
Restart the current level segment.
Quit Game
Exit the game in progress and return to the Main Menu.
Heads-Up Display (HUD)
The Heads-Up Display (HUD) appears on-screen during gameplay. The HUD provides mission-critical information.
Charge
The Charge indicates your health and is displayed incrementally, with 100 being full health. As you take damage, getting closer to death, Power drops.
If the Charge reaches 0, the mission is terminated and you must start the game over or reload from the last point saved. Pick up Fuel Cells to recharge your health.
Ammo
The Ammo readout indicates the amount of ammunition available for the currently selected weapon.
Pickup Display
This is updated as you pick up objects and power-ups.
Objective Proximity Meter
The Objective Proximity meter is located on the upper-left corner of the HUD. The white cone indicates your current heading.
Use this in conjunction with the yellow Mission Objective indicator — located on the outer ring of the radar — to track down your current mission objective. As you get closer to the mission objective, the inner rings start to fill in, indicating your proximity to the objective. The current distance from the target is indicated in meters.
Objectives
Objectives will be displayed as you receive instructions from Kate Brewster. The yellow dot on the Radar is the Mission Objective indicator. The Mission Objective indicator shows the location of the active mission objective.
As new objectives become available, new instructions will appear on-screen. Press the R3 button at any time during a mission to display the active objective.
At certain times during the game, you will have multiple objectives you can complete in any order. If you want to swap your current mission objective for another one, press the R3 button to display all active objectives and then use the directional buttons to highlight the objective you want to complete.
During the game a white cone of vision will indicate your current heading. As you get closer to the mission objective, the radar starts to fill in to indicate your proximity to it.
Weapon Reticule
The Weapon Reticule appears on-screen as a translucent icon and is used to aim your weapons. When you move the right analog stick to aim, the reticule will move on-screen.
When a threat appears and you move the reticule towards the target, targets will be highlighted. Friendly units are highlighted in blue, while threats are highlighted red.
In Terminator vision mode, additional
.png)

.png)
.png)
.png)
.png)
