Setting Up the Game
•
Set up your PlayStation®2 computer entertainment system according to its instruction manual.
•
Make sure the MAIN POWER switch (located on the back of the console) is turned on.
•
When the power indicator lights up, press the OPEN button.
•
Place the Battle Engine Aquila disc on the disc tray with the label side facing up.
•
Press the OPEN button again to close the disc tray.
•
Attach controllers and other peripherals, as appropriate.
•
Follow on-screen instructions and refer to this manual for information on using the software.
Main Menu
Use the left analog stick or directional buttons to highlight the required option before pressing the button to select it.
This option starts a new game from scratch.
Continuing returns you to the point you last reached in the current game. This option is only available if there is a game already in progress.
This option takes you to the Load Game Screen where you may load a game that you have previously saved.
This option takes you to the Save Game Screen where any progress you have made can be saved. This option is only available if there is a game already in progress.
Multiplayer takes you to the Multiplayer Select screen where you and a friend can either unite to fight the Muspell forces, sign up for either side and join a battle or settle your differences in a head to head arena.
Hint: Other Multiplayer levels become available only after completing the last level in Single Player mode.
Use this option to go to the Goodies Screen and view any Goodies that you have acquired.
This option takes you to the Options Screen where you can alter the game options to best suit yourself.
Mission Select
Starting a New Game, Loading or Continuing a previous game will bring you to the Level Select screen. Here you can choose which mission you would like to attempt.
Available missions show up as circles. Highlight the mission you wish to play using the directional buttons or the left analog stick and press the button. This will take you to the Mission Briefing and Select Configuration screens.
Grades
As you complete missions, you will be awarded a grade for your efforts. Depending on how well you performed in the mission, you will receive an E grade (could do better) through A grade (very good) and possibly even S grade (excellent!).
If you wish to enhance your grade, you can retry any mission at any time. If you succeed in bettering your grade, then the new one replaces the old grade.
Evo Missions
Most missions also have an Evo variant. These are Evolutions of the basic level and are intended for the expert gamer who is in need of a more challenging experience.
To reveal an Evo Mission, you must finish the previous mission with all Secondary Mission Objectives complete.
Mission Briefing
The Mission Briefing gives you an idea of what your objectives will be in the upcoming mission. A short overview is displayed along with extra footage of important areas or targets that you need to watch out for while playing.
Select Configuration
This is where you select your Battle Engine Configuration. For the first few missions, the only configuration available to you is the Prototype model.
As you progress through the game, the Forseti scientists are constantly refining the design of the Battle Engine and coming up with new and interesting weapon loadouts for you to play with. Choose a layout that best suits your style of play and the requirements for the upcoming mission by pressing up or down on the directional buttons or the left analog stick.
Wingman Select
On certain levels you will be able to select a wingman to accompany you by pressing left or right on the directional buttons or the left analog stick. Your wingman will stay relatively close to you in the battle and target nearby enemy units automatically.
In Game
The second section is the Rangefinder. If the target is within the current weapon's effective range, the Rangefinder will contract.
Scanner
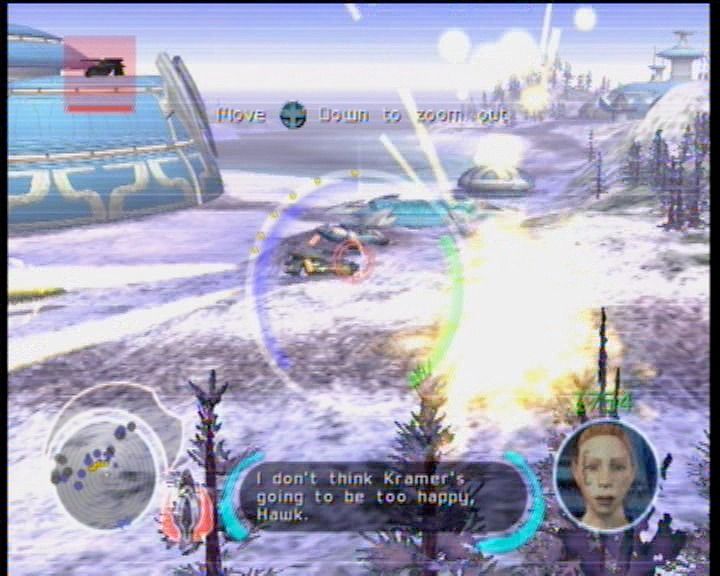
The Scanner is an advanced sensor array that shows the pilot the location of nearby friendly and enemy units. Friendly units show up as blue areas and enemy ones, red. Individual units may also be highlighted in yellow to show particular mission objectives.
Threat Circle
The large circle in the center of the screen is the Threat Circle. For the most part it is used as a compass with the notch indicating North. If that is pointing towards the top of the screen then the Battle Engine is pointing Northwards.
When in combat, however, the Threat Circle takes on a more useful role of indicating whether any missiles are currently tracking the Battle Engine and from which direction they are coming from. These are represented by triangles that move towards the Threat Circle. This shows the pilot both direction and distance to the missile, enabling him to make the best choice regarding evasive maneuver.
Any units that are highlighted on the Scanner as Mission Objectives will also appear on the Threat Circle to indicate their direction in relation to the Battle Engine.
Current Weapon
The Current Weapon indicator actually features three distinct sections.
The first section displays the name and location of the Current Weapon, showing the pilot which weapon is ready to be fired.
Some weapons may be charged up to fire more powerful rounds or larger bursts. The second section is the Charge Gauge, which fills up as the weapon is charged. Once the gauge reaches maximum, the weapon is fully charged and ready to be fired
.png)

.png)