GETTING STARTED
Set up your PlayStation®2 computer entertainment system according to its Instruction Manual. Ensure the MAIN POWER switch (located on the back of the console) is ON.
Press the RESET button. When the power indicator lights up, press the OPEN button to open the disc tray. Place the Hunter: The Reckoning-Wayward disc on the disc tray with the label side facing up. Press the OPEN button again to close the disc tray.
Attach game controllers and other peripherals as appropriate. Follow the on-screen instructions and refer to this manual for information on using Hunter: The Reckoning-Wayward.
PlayStation®2 Console Ports
MEMORY CARD (8MB) (FOR PLAYSTATION®2)
Hunter: The Reckoning-Wayward allows you to save games at their current level of play onto a memory card (8MB) (for PlayStation®2), and resume play on previously saved games. A memory card (8MB) (for PlayStation®2) is required.
Insert a memory card (8MB) (for PlayStation®2) into MEMORY CARD slot 1 on the PlayStation®2 game console BEFORE starting play.
Important
Do not switch off the MAIN POWER switch, remove or insert a memory card (8MB) (for PlayStation®2), or Controllers while saving or loading games. Doing so could damage the game data.
PLAYING THE GAME
CHARACTER ATTRIBUTES
Press the button to select a character.
•
Experience - Numeric measure indicating the Hunter's current experience level
•
Accuracy - Amount of additional damage a Hunter does during ranged combat
•
Strength - Amount of additional damage a Hunter does during melee combat
•
Conviction - A Hunter's dedication to the hunt; conviction is used to activate Edges
•
Stamina - Number representing how tough a Hunter is
•
Edges - Number of Edges the Hunter currently possesses
A Hunter's experience increases with the destruction of each enemy, as do their attributes and overall power. In multiplayer games, Hunters gain partial experience for the enemies that other Hunters destroy.
Players also receive experience points for completing various goals and missions. As your character grows in experience, their skills increase, and new Edges become available.
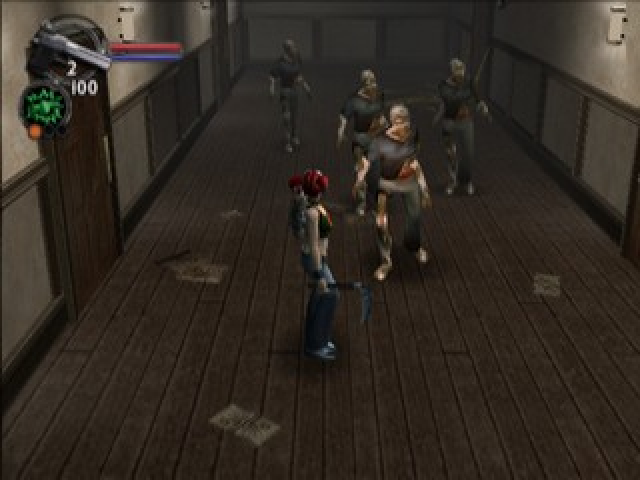
HEADS-UP DISPLAY
•
Health - This red bar represents your Hunter's health. Health can be regained by activating Health Glyphs and by gathering the red spheres dropped by enemies.
•
Conviction - Using Edges costs conviction, represented by the blue bar in the HUD. Conviction can be replenished by gathering blue spheres dropped by enemies. Conviction makes the Hunter more powerful. Hunters can also recharge conviction from Conviction Glyphs scattered throughout the game.
•
Weapon - Selected weapon and available ammunition
•
Edge - Currently selected Edge
GLYPHS
There are five types of Glyphs in the Game. To activate one, stand near or over the Glyph and press the button. Glyphs can have multiple charges, so multiple Hunters may use the same Glyph.
After a Hunter uses a Glyph, there is a short recharge period before you can use it again. When a Glyph runs out of power, its glow will disappear.
Health
The Health Glyph regenerates the Hunter's health.
Conviction
The Conviction Glyph regenerates the Hunter's conviction.
Strength
The Strength Glyph gives the Hunter a permanent increase in strength.
Accuracy
The Accuracy Glyph gives the Hunter a permanent increase in accuracy.
Cache
The Cache Glyph marks areas where equipment is stored. Look around the area and break anything nearby. These glyphs do not need to be activated.
Information (Blue)
Activating the Information Glyph gives the Hunter additional facts about the environment and clues about the game. Information Glyphs have unlimited charges. Sometimes innocents or other characters will be standing on Information Glyphs.
Exit (Green)
Activating an Exit Glyph allows the Hunter to exit the environment and progress to the next one. The Exit Glyph will not be activated until the level's mission has been completed.
HUNTER HEADQUARTERS
Use the button to activate or the button to exit locations within Hunter Headquarters.
The Computer
Hunters can communicate with one another via Hunter.net. The computer stores useful information gathered on missions.
The Trophy Room
Hunters store the trophies they earn while fighting the forces of evil in their Trophy Room. See if you're up to collecting them all!
The Mission Board
Here, Hunters select the area of Ashcroft they will venture into, find information on the missions they still need to complete, pick the Hunters from their team who will attempt the mission, and choose the special weapons they will take with them.
If you position the glyph over a level and the glyph does not glow, you can still visit this level to gain additional experience, weapons, and ammunition, but you are no longer required to undertake any specific missions there.
After making your choices, you're taken to the character selection screen where you'll choose your character and the special weapons you'd like to take into the selected level.
Hint
Although you can take only one special weapon with you, you can collect and use up to three more from the level you are visiting. After you have finished the level, the weapons and ammunition you have collected will be added to your weapon inventory for use on later levels.
.png)

.png)
.png)
.png)

.png)




.png)
.png)

.png)
_1.png)
.png)


_1.png)
.png)




.png)