GETTING STARTED
PlayStation®2 System Setup
Set up your PlayStation®2 computer entertainment system according to its Instruction Manual. Ensure the MAIN POWER switch (on the back of the console) is ON.
Press the RESET button. When the power indicator lights up, press the OPEN button to open the disc tray. Place the "Area 51" disc on the disc tray with the label side facing up. Press the OPEN button again to close the disc tray.
Attach game controllers and other peripherals as appropriate. Follow on-screen instructions and refer to this manual for information on using the software.
•
Note: Illustration may not match all PlayStation®2 console types. For owners of SCPH-70000 series PlayStation®2 systems, refer to the setup instructions supplied with your system.
VOICE CHAT/USB HEADSET
This product allows the use of the USB headset (for PlayStation®2). To toggle between Local, Team, and Global chat modes, press the button.
Your headset mute will default to on if it is plugged into your console after an online match has already started. Voice chat is only available while in an online match.
•
For more information regarding the Online features of the game, see pg. 8-9.
MENU/SUB-MENU NAVIGATION
Throughout this manual, ↑, ↓, ← and → will signify pressing Up, Down, Left and Right on the directional buttons. To navigate through the game menus (i.e. Options), use the directional buttons (↑, ↓, ← or → depending on the menu) to highlight a selection.
STARTING UP
DUALSHOCK®2 ANALOG CONTROLLER CONFIGURATIONS
•
left analog stick (L3 button when pushed down)
•
right analog stick (R3 button when pushed down)
•
Area 51 does NOT recommend or support "Analog Joystick" controllers that are not DUALSHOCK®2 analog controllers.
QUITTING A GAME IN PROGRESS
During the game, press the button to display the Pause Menu. Press the directional buttons ↓ to select Quit, then press the ✕ button. To confirm exiting the game, highlight Yes, then press the ✕ button again.
MAIN MENU
CAMPAIGN
You are Ethan Cole, a part of the Army's Hazardous Materials action and response team. As Ethan Cole, you'll follow the Area 51 storyline as you play through the game's many vast levels. You'll encounter many obstacles as you uncover the truth about Area 51.
To start your mission, select Campaign on the Main Menu. Once this option is selected, you'll need to Create a New Profile (see Profiles, next page).
Campaign Menu
Once you've created your Profile, you can select New Campaign to start from the beginning, or you can select Resume Campaign to continue a previously saved game.
SPLIT SCREEN
This option allows you and a friend to go one-on-one, selecting from available characters, weapons and up to 14 levels. Each player must first enter a Profile before the match can start (see Profiles, next page).
Once you've either selected or created a new profile, press the button to advance to the Split Screen Options menu.
Split Screen Options
Press the directional buttons or to adjust these two options:
You can set your game's Time Limit from No Limit to 60 minutes.
Set your game's Score Limit from No Limit to 200.
Once your options are set, select Continue and press the button to view the Map Select screen.
MAP SELECT
Available Maps
As you acquire new maps, you can add them to the maps listed under Map Sequence. Highlight the map you want to add, then press the button.
Map Sequence
At the Map Select screen, you can press the directional buttons for to highlight a level listed under Map Sequence. Press the button to select the level you want to play first. The next level you select will be the second level you'll play and so on. Repeat this process to place the levels in the order you want to play.
Once you've set up your maps, select Launch Server to begin.
PROFILES
In order to save games and personal stats, you'll need to create a Profile, then save it to your memory card (8MB) (for PlayStation®2). You can create a Profile without a memory card, but once you power down, your game's progress will be lost.
Profile Name
Press the directional buttons to highlight a character, then press the button to select. Repeat this process to spell out your name, then select OK to accept the name.
Controls
To adjust options, you'll either highlight the option and press the button to "check" the option's box or press the directional buttons or to make an adjustment. At any time, though, you can select Restore Defaults to return the options to their default settings.
If you're not comfortable with the game's default "Y Axis" (Up and Down) movement, you can select this option to invert the controls.
•
Horizontal/Vertical Sensitivity
You can adjust the sensitivity of the analog sticks to move slower (adjustment
.png)

![Area 51 [Steelbook Edition] box art for Playstation 2](https://media.retro.gold/Sony_-_PlayStation_2/Named_Boxarts/Area 51 (USA).png)
![Area 51 [Steelbook Edition] screenshot 3 for Playstation 2](https://media.retro.gold/Sony_-_PlayStation_2/Named_Snaps/Area 51.jpg)
![Area 51 [Steelbook Edition] title screen for Playstation 2](https://media.retro.gold/Sony_-_PlayStation_2/Named_Titles/Area 51 (USA).png)
![Area 51 [Steelbook Edition] media 5 for Playstation 2](https://media.retro.gold/Sony_-_PlayStation_2/Named_Media/Area 51 (USA).png)

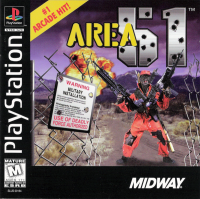

.png)

.png)
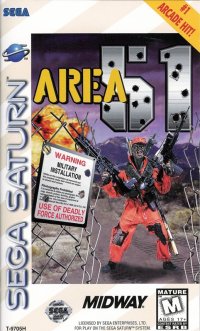




.png)
.png)

.png)








.png)