Han Solo Quote
“She may not look like much, but she's got it where it counts, kid.” - Han Solo
Welcome to the Control Center
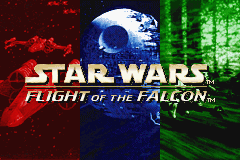
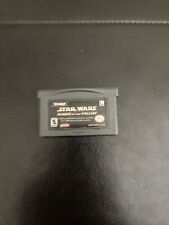
Welcome to the control center for the fastest ship in the galaxy. In *Star Wars®: Flight of the Falcon™*, relive thrilling moments in Millennium Falcon and Rebel history. Lead missions to thwart the Empire from Hoth to Endor and beyond. The fate of the Millennium Falcon, and the universe, rests in the palm of your hand. Episode IV-1: Tatooine
The Hut is set, but the Empire is waiting with a few squads of TIE fighters ready to teach smugglers like you a lesson.
Episode IV-2: Mos Eisley Spaceport, Tatooine
Han Solo has agreed to transport Luke and Obi-Wan, but on the way from the cantina their landspeeder is attacked by Imperial stormtroopers. You must quickly evade the Imperial Guard that will be taking pot shots at you. Sell your landspeeder in time to get to the Millennium Falcon before take off.
Episode IV-3: Dune Sea, Tatooine
With the 'cargo' now on board the Millennium Falcon, blast out of Mos Eisley and out over the Dune Sea. Fly low to avoid the sensors of the Star Destroyers waiting in orbit. Destroy the Imperial probe droids so that the Star Destroyers are not alerted to your position.
Episode IV-4: Death Star Approach
Over the moons of Yavin, pilot an X-wing against the Empire's forces as they fire at you in an effort to protect the Death Star. Try to use the Star Destroyers as cover as you avoid the TIE fighters' fire.
The Empire's Revenge
“Sir, the possibility of successfully navigating an asteroid field is approximately 3,720 to 1!” - C-3PO
“Never tell me the odds!” - Han Solo
The Death Star may be gone, but the Empire is as dangerous as ever. After destroying the rebel base on Hoth, their next target is the elusive Millennium Falcon.
Episode V-1: Hoth Asteroid Field
The Millennium Falcon's hyperdrive has failed. Outduel and outmaneuver the TIE fighters and bombers out to destroy you as you try to escape the Empire's clutches.
Episode V-2: Cloud City, Bespin
The Millennium Falcon now pursues the ruthless Boba Fett. Racing through the city's towers and buildings, try to take out Slave I's shields. Access its onboard computer to find out where Boba Fett is taking his cargo, the carbonite-frozen Han Solo.
Episode V-3: Escape the Executor
With the planet Bespin below you, you must escape Vader's grasp and evade his massive Super Star Destroyer, the Executor. Flying low across the length of the gigantic starship, avoid turret fire and waves of TIE fighters. Take out energy barriers blocking your path.
Battle of Endor
With their base of operations gone, the Rebel Alliance plans for a final offensive against the Empire. This offensive will result in freedom for the galaxy or the end of the Rebels forever.
Episode VI-1: Battle of Endor
The Rebel fleet has discovered that the Death Star's energy shield is still up and that they have run into a trap. Defend Rebel cruisers from multiple waves of TIE fighters and Star Destroyers.
Episode VI-2: Endor, the Forest Moon
In the forests of Endor, Imperial scout troopers have been alerted to your presence. Use a speederbike to chase them down and prevent them from calling for help. This ensures you do not ruin your mission to destroy the shield generator. Take care to avoid attacking AT-STs as you hurtle through the trees.
Episode VI-3: Death Star II Surface
With the shield generator on Endor destroyed, the assault on the Death Star can begin. Help disable the battle station's turrets and deflector towers so that an attack can be launched on the Death Star's reactor. Watch out for enemy fighters and escaping shuttles!
Episode VI-4: Reactor Core Access Tunnels, Inside the Death Star
The Millennium Falcon has managed to punch through the Death Star's defenses. Now, race through winding tunnels to destroy the reactor core. Destroy it or the Rebel Alliance is finished!


 (En,Fr,De).png)
 (En,Fr,De).png)
.png)

.png)
 (Rev 1).png)
 (Rev 2).png)
_1.png)
 (Rev 1).png)




_1.png)
.png)


 (En,Fr,De,Es,It,Nl,Sv,Da).png)


 (En,Fr,De,Es,It).png)