Hangar Menu
Enter Mission
Begin the mission.
Save Game
Save your game progress. Invasion From Beyond takes one memory card slot per save.
Options
Sound/Music Volume
Alters sound and music volume levels.
Controller Configuration
Invasion From Beyond supports the Standard Controller and Dual Shock™ Analog Controller.
In this screen, you will be able to change the default control configurations to better suit your piloting preferences. You may also turn on/off the vibration function.
Abort Game
Aborts your current game and returns to the Invasion From Beyond main menu. You will be prompted for confirmation.
Main Hangar Section
You can deploy three ships, one at a time, during each mission. At the start of the game you will only have three ships available for selection, but as you research and build new ships (to a maximum of 12) you will only ever be allowed to deploy three ships per mission.
Choose your aircraft wisely. Each has its own individual pilot, handling characteristics, cargo space and weapon slots. If you lose one of your chosen three during a mission, it will be unavailable until the next mission while it undergoes essential repairs. The panel on the left of the hangar screen displays the current three ships selected for service in the next mission. To change any of these ships, move the green cursor so that it points at the craft you wish to replace. Move through the hangar from left to right until the new ship you want to take into active service is displayed in the main viewing window, and hit X. The new will replace the old.
As a visual reminder, the bay in which selected ships reside will also have open launch doors, flashing red sirens and activated green runway strip lights.
Research and Design
To research, design and build new ships and weapon types, tap in the main hangar screen.
During missions, aside from your primary mission objectives and Earthlink guidelines, you must also collect alien components and rescue scientists and bring them all back to base as often as you can. On completion of a mission, you return to your hangar where you can implement these salvaged items and professors to build your new arsenal. Once you have built new ships and weapons, you can test them out in the Earthlink simulator. Select this option from the hangar menu. Fly your new aircraft and test your new weapons against dummy alien saucers in the Earthlink VR environment.
Components are used to build new ships and weapons. The relative costs of each are displayed in the R&D screens on selection.
Unread Messages
The icon will stay on-screen until it is read.
Important
All current primary objectives are marked in white on your radar and indicated using a green arrow in the level.
Your Ship
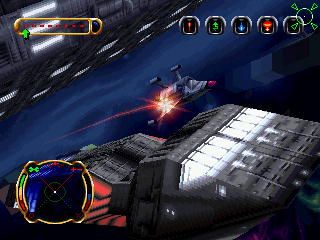
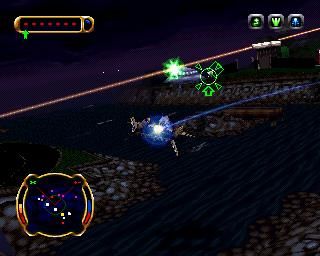
The ship you are currently piloting is in the center of the screen. All the ships in the Earthling fleet move and operate in much the same way, but all have their own quirks and characteristics. All ships accelerate forward, decelerate and reverse, strafe to the left and right and tip their nosecones up or down to aid you with targeting.
You will also find your ship closely hugs the landscape and all its undulating surfaces. This auto altitude tracking means you can concentrate on pointing your weapons at the Invaders, rather than piloting your ship. The plasma trail behind your ship also indicates its overall condition. If the trail turns black and begins to billow smoke you're in trouble and need to get back to base for a much needed re-charge.
Radar
The radar in the bottom left of the screen displays your current position in the game world. Your ship is dead center. The angles pointing forward represent your field of vision.
Other Sonar blips on the radar are:
•
ORANGE: Alien ground troops
•
WHITE: Current mission objective
•
LIGHT BLUE: Ground vehicles (Human)
•
LARGE LIGHT BLUE: Aircraft (Human)
On the left is your ship's damage bar. On the right is your Ship's energy bar.
Cargo Hold
This indicates the number of slots available in your cargo hold for collecting people and items from the landscape. The number of slots varies from ship to ship. Once you collect an object or person, an icon will be displayed relevant to the object gathered.
A green arrow points up towards your next vacant cargo slot. Hitting L1 switches the arrow to red and points it down. This indicates the object selected for ejection from your cargo.
Weapon Mounts
Shows the number of weapon slots available for the current ship and which weapon you are currently using.
Aiming Reticule
The reticule moves in front of your ship and operates in a different way depending on your current weapon selection. The more powerful weapons and most projectile weapons have manual targeting systems. Weapons like the chain-gun, laser weapons and guided missiles lock on to your selected target automatically. Essential for tracking fast moving targets.
The aiming reticule also indicates the location of your Suck-o-Matic teleport column. To suck up objects and people from the landscape, place the target over your intended cargo and hit to start the vacuum. Switching the Suck-o-Matic to blow places your intended ejection item in the location indicated by your target. A small icon will be a further guide as to what item you are about to eject.
Suck-o-Matic
An experimental device attached to all ships by default. You will use the Suck-o-Matic a lot during the game. This teleport device sucks and blows items in and out of
.png)


.png)


.png)

.png)
.png)
.png)

.png)