Reset Button
Power Indicator
Power Button
Controller Port
SONY
Open Button
Disc Cover
GETTING STARTED
Set up your game console according to the instructions provided in its Instruction Manual.
Always ensure you switch the power Off before inserting or removing a compact disc from the game console.
Insert the Star Trek Invasion compact disc and close the disc cover. Connect game controllers to the controller ports and switch the power on.
Follow the instructions on the screen to begin playing Star Trek Invasion.
Make sure you have enough free blocks on your memory card before you begin play.
Do not insert or remove game controllers or memory cards once the power is turned on.
Weapons
•
Quantum Torpedoes: Advanced projectile munitions with a zero-point energy field warhead.
•
Gravitic Mines: Deployable proximity mine with graviton-based detonation core.
•
Tractor and Pressor Beams: Focused linear graviton beams used to manipulate objects across short distances.
SYSTEMS OPERATIONS MENU
Use the directional buttons to choose a menu option, and press the X button to select it. Press the A button to cycle back through your choices.
•
Start Game — Begin a new Star Trek Invasion game.
•
Memory Databanks — Select a saved game from a Memory Card.
•
Options — Open the Options Menu.
•
Dual Play — Open the Dual Play Options Menu (see Holomatch Play).
Options Menu
Use the Options Menu to select settings for gameplay options by pressing the X button.
•
Audio—Adjust volume of sound effects, music or speech.
•
Video — Center the screen.
•
Split-Screen— Choose from top and bottom or side by side player views.
•
Controller Configuration — Displays game control functions.
•
Vibration —Toggle DUALSHOCK Analog Controller vibration function On or Off.
•
Motion Lock —Switch between default settings.
•
Energy — Configure Energy Management System to favor engines, weapons or default setting.
•
View —View the movie sequences as they are unlocked by selecting Movies, examine the database of vessels encountered in the archive or check the high score rankings and production credits for Star Trek Invasion.
•
Difficulty —Toggle the game difficulty level between Cadet (easy), Ensign (normal) or Lieutenant (hard).
Pause Menu
Press the Start button at any time during gameplay to pause the game and bring up the Pause Menu.
•
Continue —Returns you to your current mission.
•
Restart Mission — Ends current mission and begins again from start.
•
Abort Mission — Ends current mission.
•
Audio Options —Adjust volume of sound effects, music or speech.
•
Mission Objectives —Review your current mission objectives.
•
Quit Game — End mission and quit to the Systems Operations Menu.
GAMEPLAY
Head-Up Display (HUD)
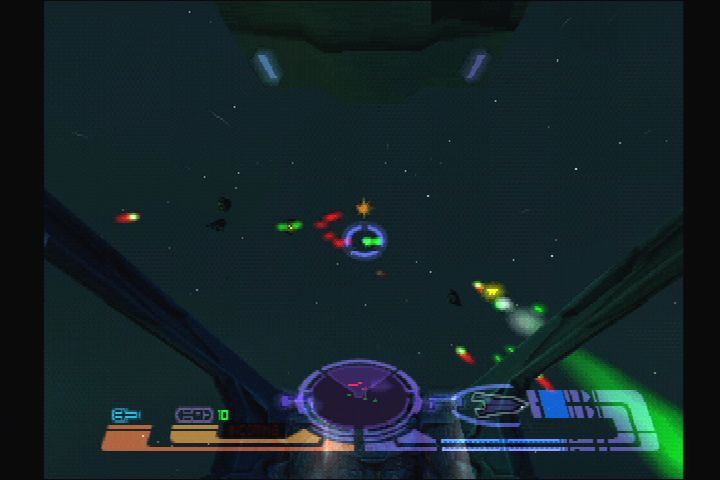
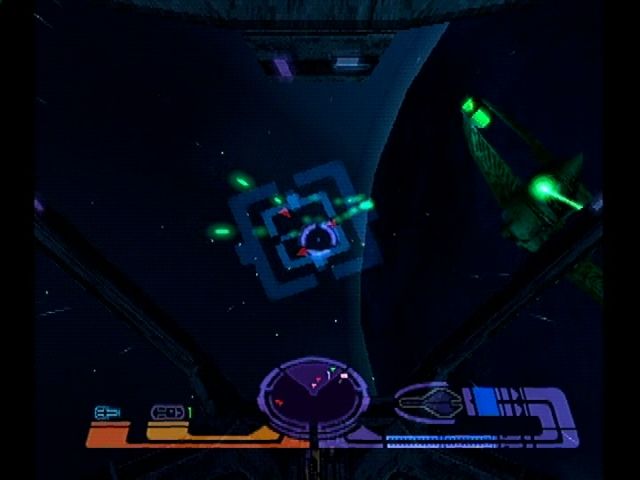
Your Valkyrie's HUD is made up of three distinct displays laid out from left to right along the bottom of your screen. At the extreme left are your weapons controls. The first icon indicates your energy weapons compliment and current primary weapon, while the second indicates your projectile weapons compliment and current secondary weapon.
Using O button to select your weapons will activate these icons and display your current weapons settings. In the middle of the HUD is your sensor display, which shows the relative position of your ship to allied and enemy vessels in your area as a circular panel. At the far right of your screen are your displays for energy management of weapons and engines, and your current hull and shield strengths.
While aboard the U.S.S. Typhon, you may be assigned to man one of the ship's defense turrets. The turret HUD places the sensor display in the top left corner of your screen, and the hull and shields display in the top right corner. During Holomatch play, the HUD elements are arranged with the sensor display in the bottom right corner of the screen, the hull and shields display in the top left corner and the weapons display in the lower left.
Targets behind and to the sides of your vessel are those outside the triangular wedge.
Hull and Shields
All starships have a hull and shield capacity based on their size and power outputs. In order to engage and neutralize enemy vessels, you must first destroy their shields before firing on their hull.
The displays at the lower right of your screen indicate the hull and shield strength of your Valkyrie. A blue color indicates that your hull and shields are at optimum power and red indicates that they are weakening. If the displays begin to glow, beware this indicates that your shields are about to collapse and your hull is in danger of breach.
Energy Management System
The Valkyrie's energy requirements are controlled by the vessel's on-board computer, which shunts power from the main reserve to the engines or weapons as needed. The system has three parts:
•
Energy Reserve - This is the main pool of energy and all power is distributed from this resource. The reserve can be replenished by picking up Warp Plasma remnants with your ship's Bussard collectors.
•
Weapons Energy Meter - This gauge shows weapons power usage. Note that using the Motion Lock, Charged Weapons and the Cloaking Device will cause power to drain faster than normal.
•
Engine Energy Meter - This gauge shows engine power usage. Note that using Warp Speed, Strafing and Evasive Maneuvers will cause power to drain faster than normal.
Video Window
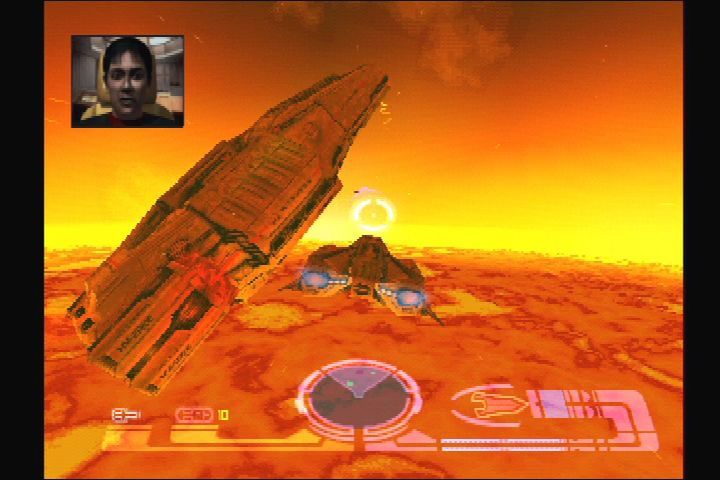
During the game, you may receive hails and communications of importance to your mission from other vessels nearby. Visual transmissions are displayed in the Video Window, which appears in the top left corner of your screen as required.
Weapons Enhancements
The modular design of the Valk
.png)

.png)
.png)
.png)


.png)