GETTING STARTED
Set up your PlayStation®2 computer entertainment system according to the instructions in the manual. Make sure the MAIN POWER switch (located on the back of the console) is turned ON.
Press the RESET button. When the power indicator turns green, press the OPEN button and the disc tray will open. Place the My Street™ disc on the disc tray with the label side facing up. Press the OPEN button again and the disc tray will close.
Attach a game controller and other peripherals, as appropriate. Follow the on-screen instructions and refer to this manual for information on using the software.
Memory Card
To save game settings and progress, insert a memory card (8MB) (for PlayStation®2) into MEMORY CARD slot 1 of your PlayStation 2 computer entertainment system. You can load saved game data from the same card or any memory card (8MB) (for PlayStation 2) containing previously saved My Street games. Multitap (for 3 or 4 Player Games)
For a 3 or 4 Player game, use a multitap (for PlayStation 2) (sold separately). Each player will need a DualShock®2 controller. Connect the multitap (for PlayStation 2) to Controller Port 1 of the PlayStation 2 console. Then connect the controllers to the controller ports on the side of the multitap. You cannot use the multitap (for PlayStation 2) in Controller Port 2. When the multitap is connected to Controller Port 1, you cannot connect a controller to Controller Port 2. When using the multitap, insert the memory card, (8MB) (for PlayStation 2) into MEMORY CARD slot 1-A of the multitap. Network Adaptor
To compete in Online Play you must have an internet connection through a broadband, or 56K dialup account. Install and set up your Network Adaptor (Ethernet/Modem) (8MB) (for PlayStation 2) according to the instructions in its manual. A memory card with a valid Network Configuration must be inserted into the MEMORY CARD slot before starting up My Street to play online.
THE CREATE-O-KID SCREEN
Before playing, you need to create a kid. Create your kid from the shoes up and conquer the My Street games! Decide on looks, clothing style, colors, and even voice. Make a he, a she, or somebody really weird. Just make a winner!
Creating a Kid
On the main Create-O-Kid screen, select CREATE to display your Create-O-Kid options or load a previously created kid.
•
Press the left analog stick or directional buttons to highlight an option and press the button.
•
Press the left analog stick or directional buttons to change a setting.
•
In multiplayer games, Player 1 creates a kid followed by the remaining players in numerical order.
Customize
Create every feature of your kid. Add a hat, change the hair, pants, shirt and shoes.
Color
Select COLOR to display the Color Menu. Highlight a feature and press the button to open its color palette.
•
Press the left analog stick or directional buttons to set the color you want and press the button.
•
Change the contrast or brightness of the color by pressing the R1 and R2 buttons.
Random
Press the directional buttons to create a kid with randomly generated features.
Pre-select
Select from a group of already created kids.
Voice
Select your created kid's voice. To listen to the highlighted voice, press the button.
Save Kid
Save your kid creation to a memory card (8MB) (for PlayStation 2). •
Select an empty file to save your kid. If you select a file that already contains data, the old data will be overwritten.
•
Enter a name for your kid. Press the left analog stick to highlight a letter and press the button to enter it. You can enter up to 12 characters.
•
If you change your mind, press the L2 or button to delete a character. Enter your character's name and press the button to enter the new name and return to the previous screen.
Loading a Previously Created Kid
1. On the Main Create-O-Kid screen select LOAD.
2. Press the left analog stick or directional buttons to highlight YEAH or NAH slot where your kid is located and press the button.
Note: In Story Mode loading a new kid will erase any progress made since your last save.
GETTING AROUND ON THE STREET
•
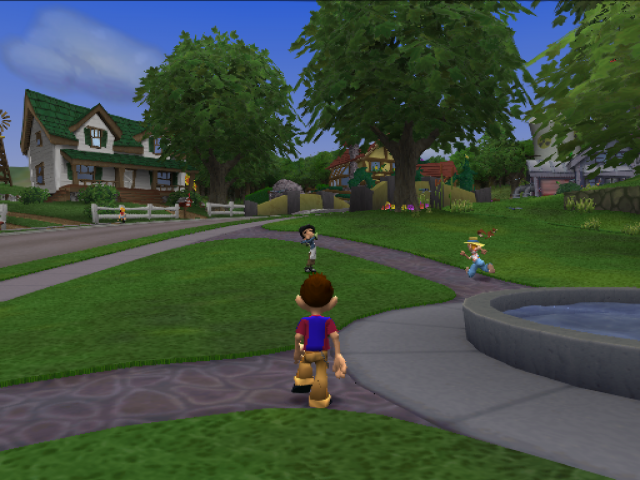
Press the left analog stick to move your kid.
•
Press the button to talk to other kids.
Boundaries
When your kid wanders toward the boundaries of the neighborhood or into certain areas, you will see a three second warning. Move your kid back to avoid being repositioned in front of his or her house.
To gain access to some areas your kid must be properly equipped with certain inventory items.
SINGLE PLAYER GAME
You can play single player games in two modes:
•
Play Mode - Select PLAY from the Main Clubhouse Menu, to play quick single Mini-games or set up a tournament with multiple Mini-games.
Note: Select PLAY mode for multiplayer games too! See "Starting a Multiplayer Game" on page 14 for more information.
.png)

.png)

.png)
_1.png)
_1.png)


.png)