Getting Started
•
Turn OFF the power on your Super NES.
•
WARNING: Never try to insert or remove a Game Pak when the power is ON.
•
Make sure a controller is plugged into the #1 port on the console.
•
Insert the Game Pak into the slot on the Super NES. Press firmly to lock the Game Pak in place.
•
Turn ON the power switch.
•
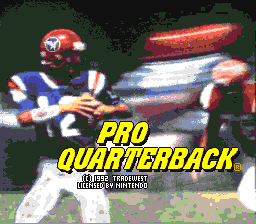
When you see the Pro Quarterback® logo screen press START to begin the game and get to the Options Screen.
The Options Screen
The Options Screen will appear every time you play Pro Quarterback®. Use it to customize the game you are about to play.
•
Move Up And Down Thru List Of Options
•
Exit Screen And Start Game
•
Scroll Thru Choices Of Current Option
Options Menu
•
Players: Choose One Player (against the computer), Head-to-Head (against another person), or Teammates (two players against the computer).
•
Team 1: Player 1 can play for any team. As teammates, player 1 is the quarterback. He calls the plays and appears with a number 1 over his head.
•
Team 2: In one player games and as teammates, Team 2 is the computer. In two player games Team 2 is the second player. The second player will appear with a number 2 over his head.
•
Quarter Length: Quarters can be 2, 5, 10 or 15 minutes in duration.
•
Field: There are six types of fields you can choose from. Grass, mud, dirt, snow, rain and artificial turf are your options.
•
Player ID: You have the option of turning your player number off. (Player one has a number 1 above his head. Player two, a number 2.)
•
Music: You have the option of turning the sound off.
The Kick-Off
After leaving the Options Screen prepare for the kick-off. Team 2 always kicks off to Team 1 at the beginning of a two player game. The second half will start with Team 1 kicking off to Team 2.
The camera follows the ball once it is kicked and the receiving team will scroll onto the screen from below. The player receiving the kick-off will appear in a highlighted uniform. This is the player you control.
Once the receiving player has received the ball, use the control pad to guide him up field in any of eight directions. If you receive the kickoff in the end-zone and a defender is within 5 yards your player will automatically down the ball. The first play from scrimmage will be 1st and 10 from the 20 yard line.
Passing and Catching
Press the B button to snap the ball. Once the ball has been snapped, player 1 controls the quarterback. He will scramble in whatever direction you indicate with the Control Pad.
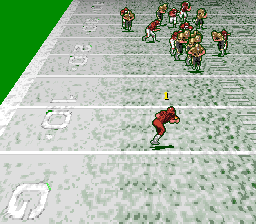
To throw a pass, press the B button. The camera will follow the ball in flight. (Your Quarterback has an arm that can reach a maximum of 50 yards.)
You will have control of the receiver when the ball reaches the halfway point. If you want the receiver to make the catch on his own, release the controls and don't touch them again until the ball is caught.
If you do want to control the receiver, guide him towards the yellow X. To make the catch, align the receiver so he is standing near the X. The X indicates approximately where your receiver should stand, not where the ball will land. As teammates, player 2 is always in control of the receiver.
Since your quarterback isn't perfect his aim is sometimes a little off, so you can only expect an average pass completion percentage. To improve that percentage you'll need to take control of your receiver and guide him to the ball.
Pitch and Hand-Off
As the quarterback you can pitch/hand-off the ball. If the selected receiver is in close range, pressing the B button will cause the quarterback to pitch or hand-off the ball.
Diving
To dive, press the control pad and the Y button at the same time. You'll dive in the direction you press on the control pad. Diving is useful in tackling and for gaining an extra yard or two.
Kicking and Punting
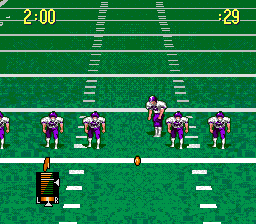
Field goals, kicks/punts are controlled the same way. You will see a gauge with two bars and two arrows.
The horizontal gauge with the L and R on it indicates direction. Use it to compensate for wind conditions and aiming. Move the arrow horizontally with the left and right on your control pad.
The vertical bar and its arrow indicate strength. Use it to balance the strength vs. accuracy required for a kick or punt. The horizontal white line on this gauge indicates maximum accuracy. The top of the gauge indicates maximum strength with minimum located at the bottom.
Gauges are activated with the snap during field goals and punts, and with the whistle when kicking off. The arrow next to the gauge will move up and down. When the arrow reaches the desired line (strength), press the B button to kick.
The Play Select Screen
The scoreboard indicates wind direction and velocity. Just below the flag is the current down and the number of yards to go for a first down. On the right is the position (yard) that the ball is on. Beneath that is the play clock.
Defensive plays appear at the top of the screen. A list of the defenses on the right and a diagram of the current defense on the left.
•
Use the control pad to scroll through the list.
-
.png)

.png)
.png)


.png)


.png)
.png)
.png)

.png)