Setting Up the Game
Set up your PlayStation® game console as instructed in its manual. Ensure the power is off before inserting or removing a compact disc. •
Insert DISC 1 of Chrono Cross™ into your PlayStation game console and close the disc cover. •
Insert game controllers and turn the power on.
•
The Title Screen will appear after an opening movie sequence.
•
Press the START button at the Title Screen to proceed. (The opening sequence can be skipped at any time by pressing the button.)
•
Highlight <New Game>, and press the button to confirm.
Entering Names
At the Name Input Screen, a cursor allows you to choose letters to name your character.
•
After selecting the <Change name> option, highlight a letter by moving the cursor with the directional buttons.
•
Press the button to confirm the letter selection.
•
Any mistakes can be deleted by pressing the button.
•
When you have finished naming your character, move the cursor out of the letters box with the directional buttons and choose the <Confirm> heading on the clock-dial menu.
•
Press the button here to finalize your character's name.
Continuing a Game from Saved Data
To continue a game from previously saved MEMORY CARD data, start the game as if beginning a new game.
•
At the Option Screen, highlight <Continue> and press the button.
•
Using the directional buttons, choose the MEMORY CARD slot that contains the MEMORY CARD data you wish to use, and press the button.
•
Finally, highlight the MEMORY CARD block to load by moving the cursor with the directional buttons, and press the button again to load the saved game.
Caution When Changing Discs
At a certain point in the game, Chrono Cross will prompt you to "PLEASE INSERT DISC 2."
When changing discs, do not turn your console's power off. Simply follow the instructions displayed on the screen by opening the console's lid and inserting the disc.
Moving on the World Map
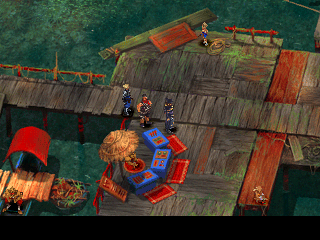
Use the directional buttons to move from one place to another on the World Map. You need to stop at towns, dungeons, and other locations to progress in the game.
Names of places will appear at specific locations on the World Map. Press the button while the name of a specific place is displayed to enter that location.
As the story unfolds, you will also be able to travel on the sea using boats. Traveling by boat is similar to ordinary movement. Use the directional buttons to move, and press the button to get on and off your vessel at set locations.
Gathering Information Through Conversation
You will need to gather information by conversing with people.
•
To talk, press the button while facing the person with whom you wish to speak.
•
When a choice of reactions or responses appears during a conversation, make your selection with the directional buttons and confirm your choice with the button.
Elements
"Elements" are the central part of a new ability system unique to Chrono Cross. Elements bestow upon their possessors such powers as magic, special "Tech Skill" attacks, and summoning abilities.
You can freely allocate these Elements to each character's "Element Grid" for use during battle. Which Element to give to each party member, and at what level to set them in the Element Grid, will all form part of your overall battle strategy.
Use Elements
You can use "Consumable" Elements at any time during the game to restore HP or remove status effects.
•
Choose the <Elements> command from the Main Menu, followed by the <Use> Sub-Menu command.
•
After selecting which Element to use, you can then decide on whom to use it. You are not limited to the characters in your current party.
•
If you keep pressing the left directional button until the cursor goes off the Character Selection Screen, a list of all the characters who you have befriended will be displayed.
•
By scrolling up and down this list, you can choose to use Elements on characters who are not in the current party.
Allocate Elements
With the <Allocate> Sub-Menu command, you can allocate Elements obtained from shops, enemies, and treasure chests to each character's Element Grid for use during battle. Elements that are currently positioned in the Element Grid can also be relocated to other positions on the grid.
•
After selecting a character, choose the Element you wish to allocate and decide where to place it on the grid.
•
The range of valid grid positions an Element can be allocated to will be shaded in red.
•
You can switch between grid levels by pressing the left or right directional buttons.
•
You can also select a grid position first and then choose the Element you wish to allocate to that position. In this case, Elements that cannot be positioned in the selected grid level will be displayed in a gray font.
The top two entries in the list of Elements have special functions.
•
Press the left directional button here to display the <Remove All> and <Remove> functions.
•
Press the right directional button to display the <Auto Allocate> and <Fill Blanks> functions.
•
Execute the highlighted function by pressing the button.
You can change the order of Elements in your current list by pressing the button and selecting which system you prefer. You can switch between characters in your current party with the L1 or R1 button. If you keep pressing the left directional button during character selection until the cursor moves off the left side of the Character Selection Screen, a list of all your current characters will appear, allowing you to allocate Elements to characters who are not in the current party.
Element Base Levels and Level Ranges
Each Element has its own "Base Level" as well as
 (Disc 1).png)

 [NTSC-U] [SLUS-01041].png)
.png)
